
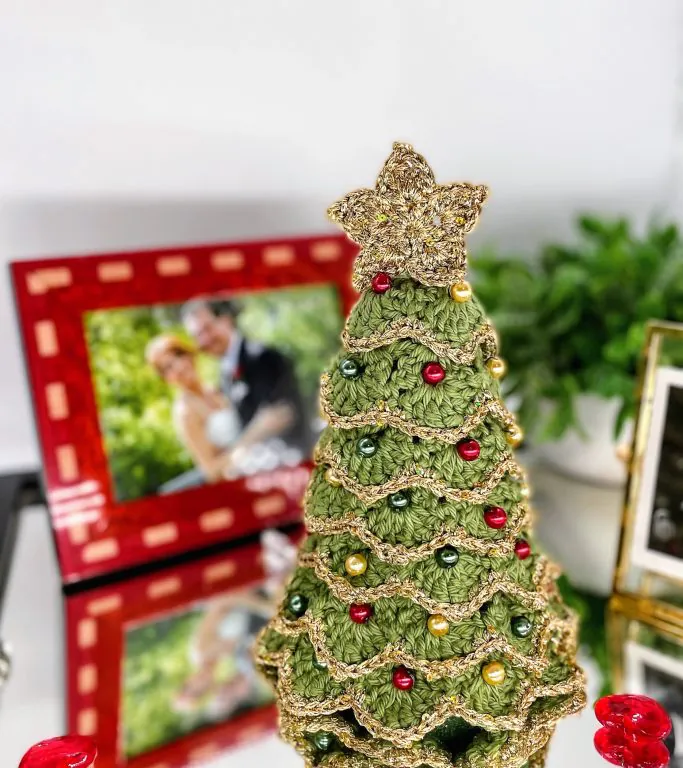
Grandma’s Christmas Tree is my favorite kind of holiday make — a free 3D crochet Christmas tree that’s beginner-friendly and genuinely quick. You crochet one long band in simple rows, then wrap it around a foam cone, and suddenly you’ve got a little tree. It’s perfect for small spaces, shelves, and desktops that need a bit of festive cheer.
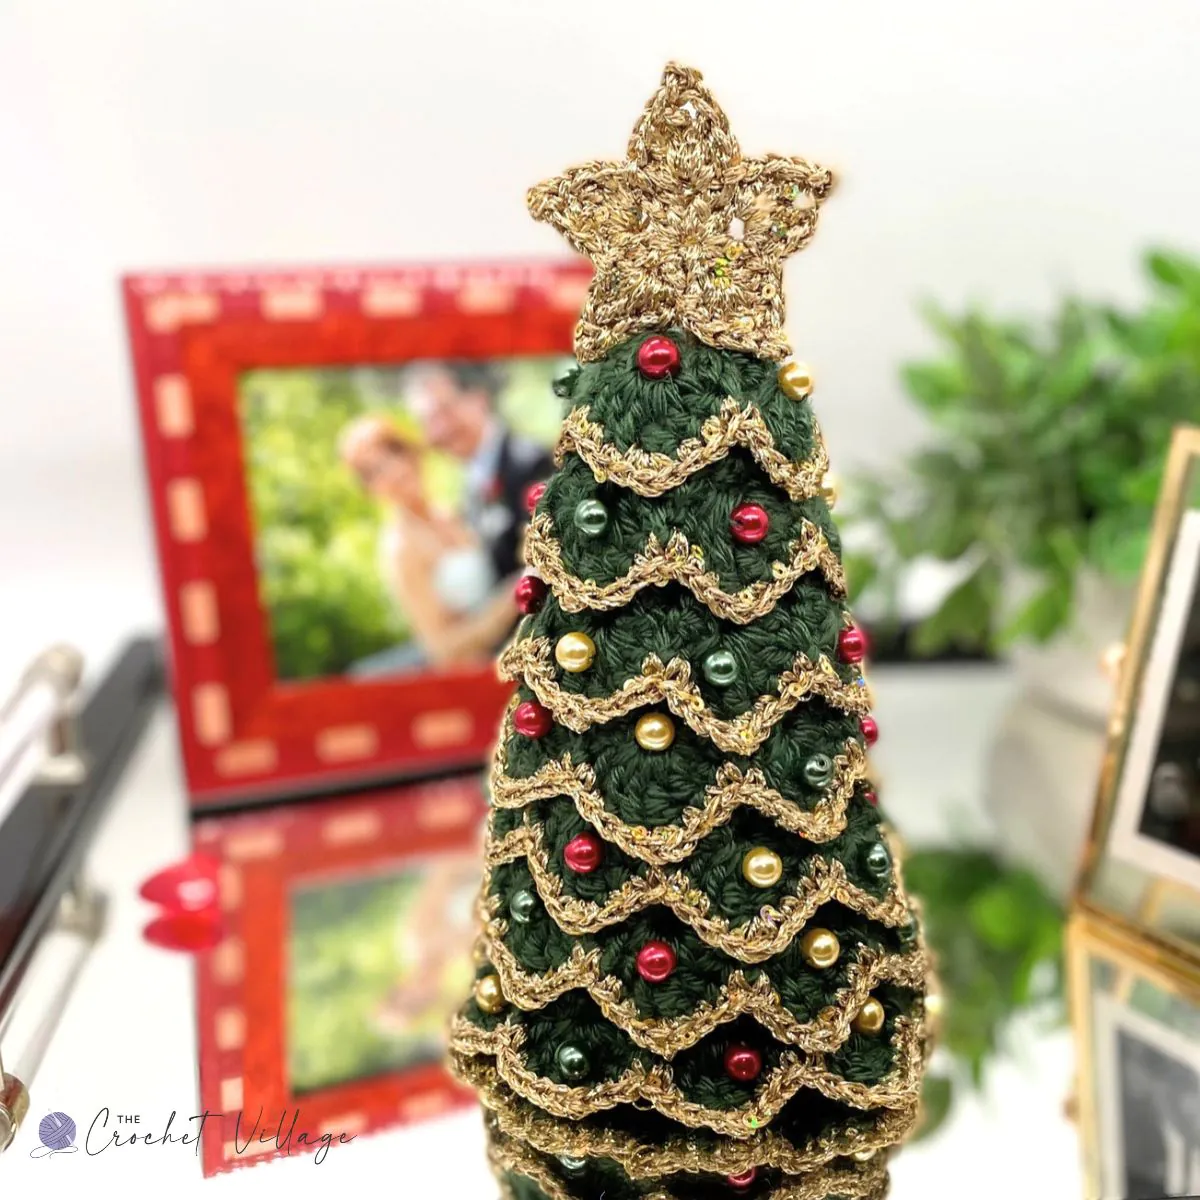
I’m so excited to share Grandma’s Christmas Tree with you! This one is close to my heart — my grandmother made these little trees every single year, and I’ve simplified her original pattern with a few personal touches to make it beginner-friendly and festive.
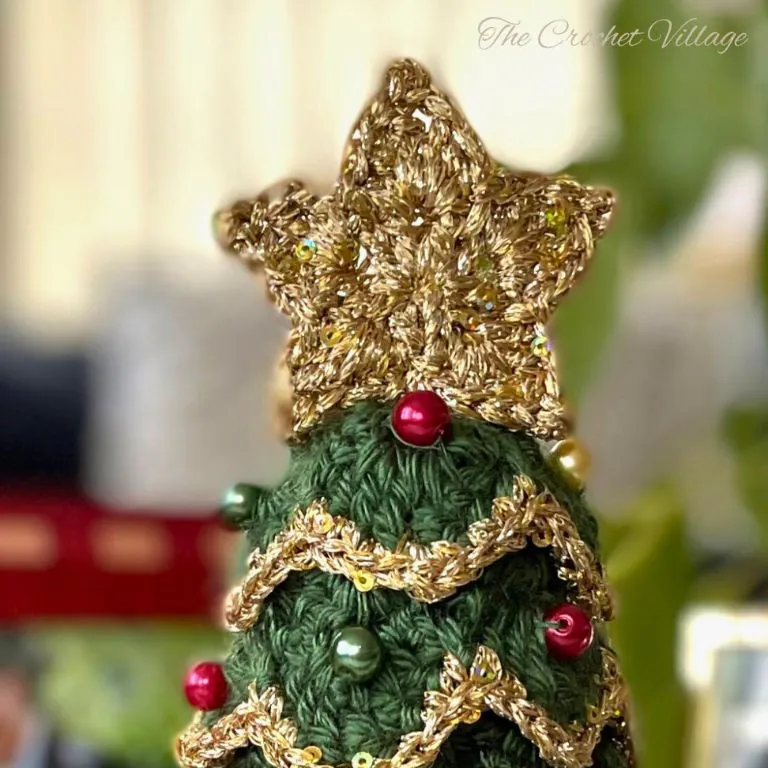
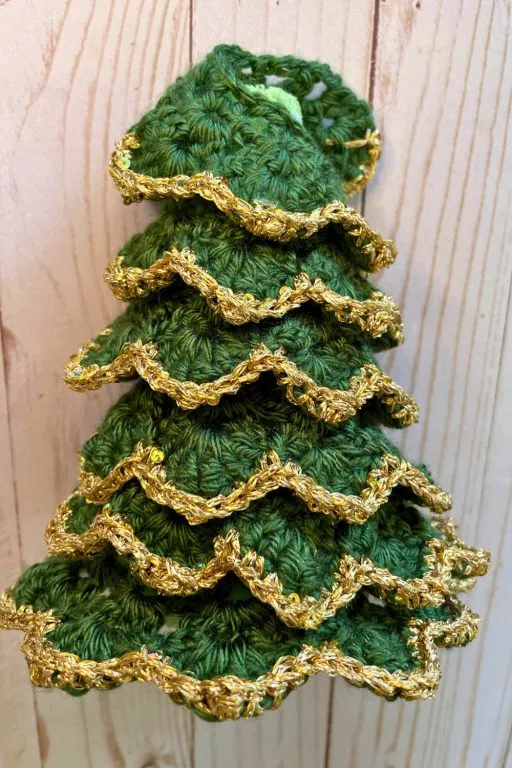
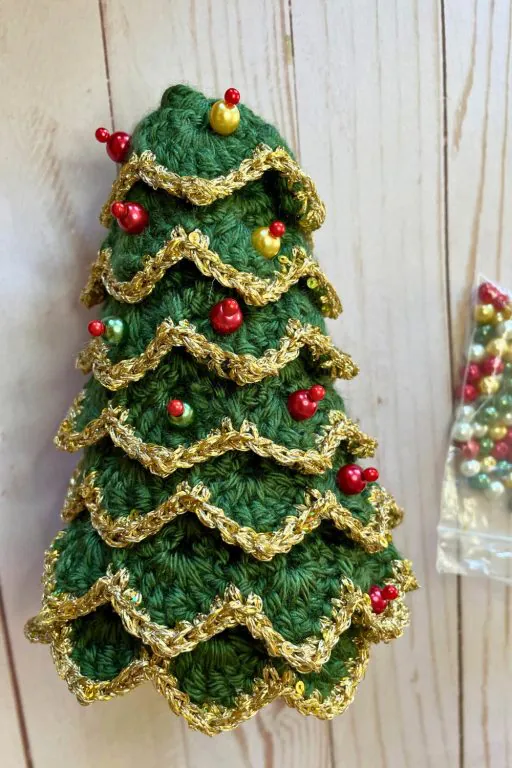
It starts as one long band worked flat in rows, which I finished with a golden border for a little extra sparkle, then simply wrapped around a foam cone. I crocheted a star to top it off and decorated it with Christmas-colored glass beads — you can sew them on or simply glue them, whichever you prefer.
The traditional version has that gold edging and the beads, but it looks just as lovely in a plain or variegated yarn if you’d rather keep things simple.
This easy crochet Christmas tree pattern stands 9½ inches tall — perfect for a desktop, a shelf, or any cozy corner that needs a little holiday magic, especially if you don’t have room for a full-size tree. Keep reading for the free pattern!
Why You’ll Love This Crochet Christmas Tree
This 3D tree has a slightly old-fashioned charm to it, and it looks far more complicated than it actually is. It’s a genuinely easy project that happens to look wonderfully elaborate.
- Beginner-friendly — worked flat in simple rows, no shaping or stuffing
- Quick to make — an easy one-evening project
- Perfect for small spaces — stands 9½ inches tall, ideal for desks and shelves
- No sewing required for the beads — you can simply glue them
- Fully customizable — gold edging and beads, or keep it simple in a variegated yarn
- Uses very little yarn — a great way to use up festive scraps
- A sweet handmade gift — thoughtful, nostalgic, and genuinely useful décor

In this free pattern, I’ll share everything you need to make this lovely 3D crochet Christmas tree — the yarn, the hook, the foam cone size, and full step-by-step instructions. Keep reading for the free pattern!
Prefer an Ad-Free Printable PDF?
The full pattern is always free right here on the blog. But if you’d rather crochet from a clean, well-formatted, ad-free printable PDF, it’s available in my online shops listed below for a small fee — and it helps me keep offering free patterns here on the blog, which I truly appreciate 💛
Prefer A Printable PDF?
Treat yourself to the ad-free, beautifully formatted version of this design for a small fee!
christmas
Free Crochet 3D Christmas Tree Pattern Starts Here
RECOMMENDED YARN: Any #4 worsted-weight yarn works. I used:
- Loops & Threads Soft and Shiny Yarn. Color shown: Parsley (Yarn A)
- Charle Stella Yarn. Color shown: Sunbeam (Yarn B) for the border and the star.
- Yarn Information: Unfortunately, Yarn B has been discontinued. You can substitute it with any metallic yarn—double the strand if it’s too thin. Alternatively, a brown-colored yarn like Lion Brand 24/7 Cotton in Taupe works just fine.
YARN SUBSTITUTION
- Red Heart Super Saver Yarn
- Paintbox Yarns Simply Aran Yarn
- Premier Yarns Basix
- Caron One Pound Soft Yarn
- Caron Simply Soft Yarn
- Yarn Bee Soft Secret
- Silky Soft Yarn by Loops & Threads
- Lion Brand Yarn Pound of Love
YARDAGE: About 125 yards
HOOK: (H) 5 mm
GAUGE: Not important for this pattern
OTHER MATERIALS
- 8 mm Christmas Glass Beads: Mine are from Etsy, but you can find similar ones on Amazon.
- Foam Cone: 3.7 inches x 8.9 inches.
- Pins and a Toothpick: For securing beads during assembly.
- Glue or Sewing Supplies: If gluing the beads, you’ll need a glue gun or super glue. If sewing the beads on, use a needle and thread in the same color as Yarn A.
- Tapestry Needle: To weave in any ends.
PATTERN NOTES
- TERMINOLOGY: Written in US terms.
- DIFFICULTY: Easy
- CONSTRUCTION:
- The body is crocheted in rows to form a long band, which is then wrapped around a foam cone.
- Beads can be either glued or sewn on.
- For the edging and star, use any gold yarn—double it if it’s too thin.
- The yarn used is #4 weight, but it’s on the thinner side
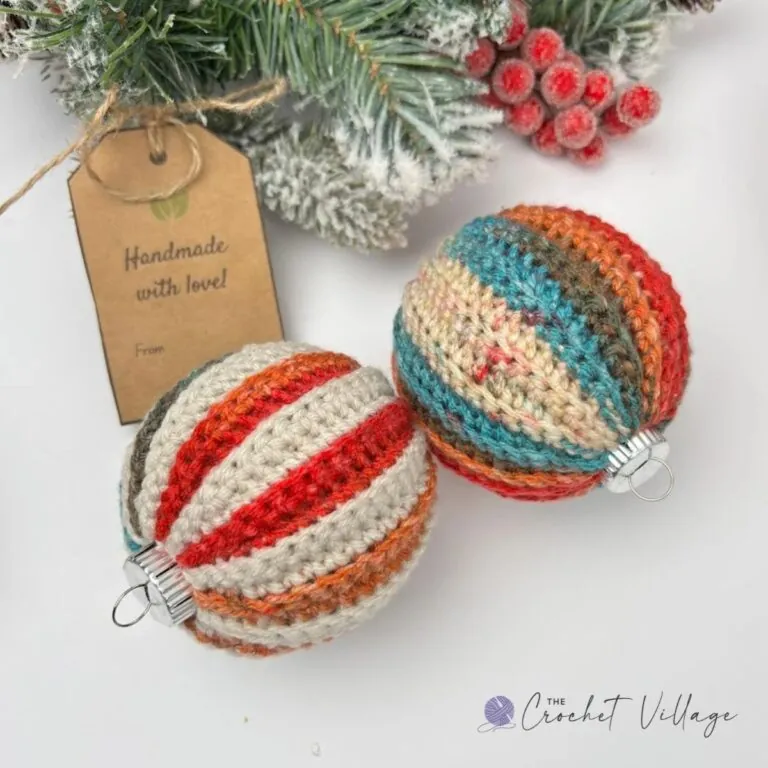
VARIATION: In other photos, I used a variegated yarn and skipped the border and the star. I used Big Twist yarn in the color shown: Party at North Pole Stripe.
FINISHED MEASUREMENTS: Approximately 9.5 in. tall
ABBREVIATIONS
- CH: Chain
- ST: Stitch
- STS: Stitches
- SL ST: Slip stitch
- SC: Single crochet
- DC: Double crochet
- TR: Treble
- YO: Yarn over
- SP: Space
- RND: Round
- REP: Repeat
SPECIAL STITCH: Picot: CH 3 from the point where you want to add the picot stitch, then SL ST in the 3rd CH from the hook. This creates your picot stitch.
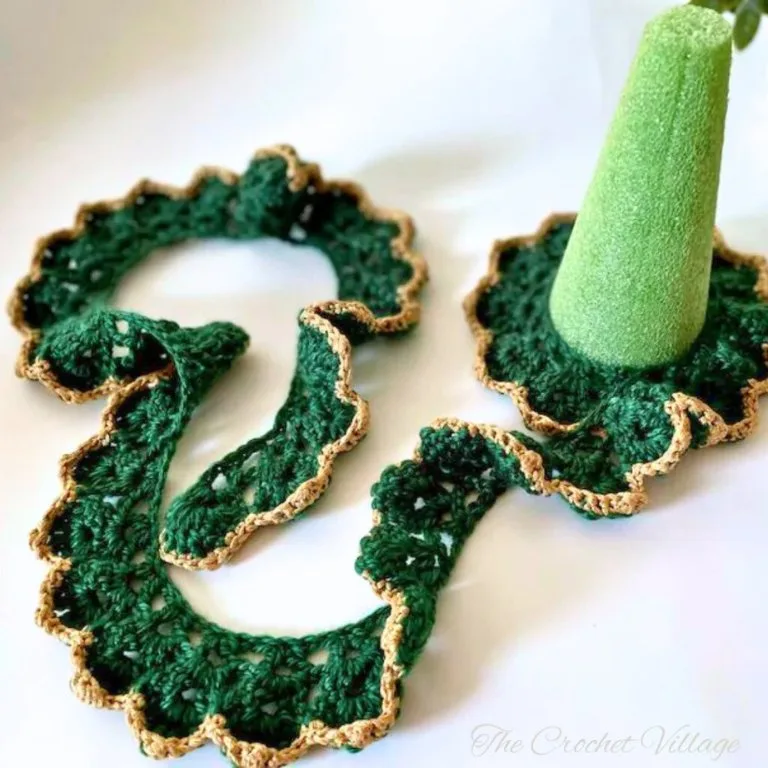
Step 1 – Crochet the Body
With Yarn A, CH 156 to make a foundation chain.
Row 1 – RS: DC in the 6th CH from the hook. *CH 1, skip the next 2 CHS, work (DC, CH 2, DC) in the next CH; repeat from * across, ending with (DC, CH 2, DC) in the last CH. Turn.
Row 2: CH 3 – counts as DC. Work (DC, CH 2, 2 DC) in the next CH-2 SP. *CH 2, work (2 DC, CH 2, 2 DC) in the next CH-2 SP; repeat from * across, ending with CH 2, work (2 DC, CH 2, 2 DC) in the starting CH-6 SP. Turn.
Row 3: CH 1. Work (2 DC, 2 TR, 2 DC) in the 1st CH-2 SP. *SC in the next CH-2 SP, work (2 DC, 2 TR, 2 DC) in the next CH-2 SP; repeat from * across, ending with SC in the top of the beginning CH-3. Fasten off. Cut Yarn A.
Step 2 – Crochet the border
With the RS facing, join Yarn B with a slip knot. SC in the 1st DC, SC in the next 2 STS. *(SC, HDC, SC) in the next ST – between the 2 TR, SC in the next 6 STS; repeat from * across, ending with SC in the last 2 STS. Fasten off.
Step 3 – Crochet the Star
With Yarn B, make a magic circle.
Rnd 1: CH 4 – counts as DC plus CH 1. *(2 DC, CH 1) in the circle 4 times, DC in the circle. Join with a SL ST in the 3rd CH of the beginning CH-4. Pull the tail to close the magic circle and secure with a couple of knots.
Rnd 2: CH 1. *(HDC, DC, TR, picot, TR, DC, HDC) in the next CH-1 SP, SL ST between the next 2 DC; repeat from * around. Join with a SL ST in the beginning CH-1. Fasten off. Weave in all ends.
Step 4 – Assemble the Tree
Attach the Fabric to the Cone
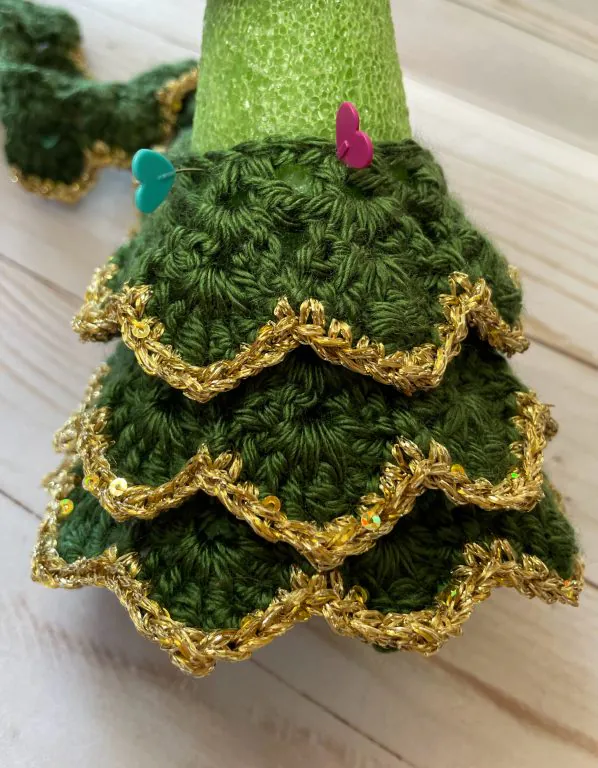
- Starting about 1½” from the bottom of the foam cone, use a pin to attach the end of your crochet fabric.
- Wrap the fabric around the base of the cone in a full circle and secure it with another pin.
- Continue wrapping the fabric upward in a spiral to cover the cone. If you have extra fabric, adjust and reposition the layers until they fit evenly. Ensure the layers are symmetrical and that the top of the cone is fully covered. Use pins as needed to hold everything in place.
- Once you’re happy with the placement, glue the foundation chain to the cone—starting from the bottom—using small drops of glue. Remove the pins as you go, and allow it to dry completely before decorating.
Attach the Beads
- Pin the beads to the tree, adjusting their positions and alternating colors to your satisfaction.
- Remove one pin at a time to glue or sew the beads. If sewing the beads, use the same color thread as the yarn.
Attach the Star
- Cut the top end of a toothpick, then tightly wrap yarn B around it. Secure with a few drops of glue and let it dry.
- Glue the toothpick to the back of the star. Let it dry.
- Stick the toothpick into the top of the tree. You may add a drop of glue to secure it, and you are all done!
I offer full support to help you with any questions or challenges you might have. Feel free to drop your comments in the section below or join our Facebook group, where I, along with my wonderful testers and community members, will be more than happy to assist you!



For the edging where it says to do (SC,HDC,SC) in next stitch ( in between the 2 TR). so does this mean to skip the two TR actual stitches and do the () sts actually between the two TRs ?
Hi Sue,
Yes — you’ll work the (SC, HDC, SC) group in the space between the next 2 TR stitches.