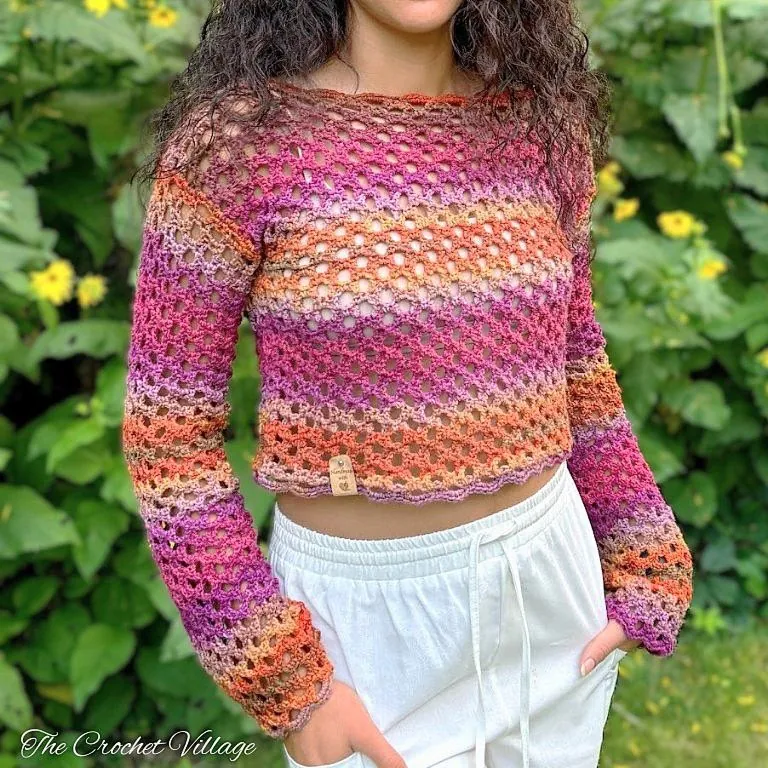
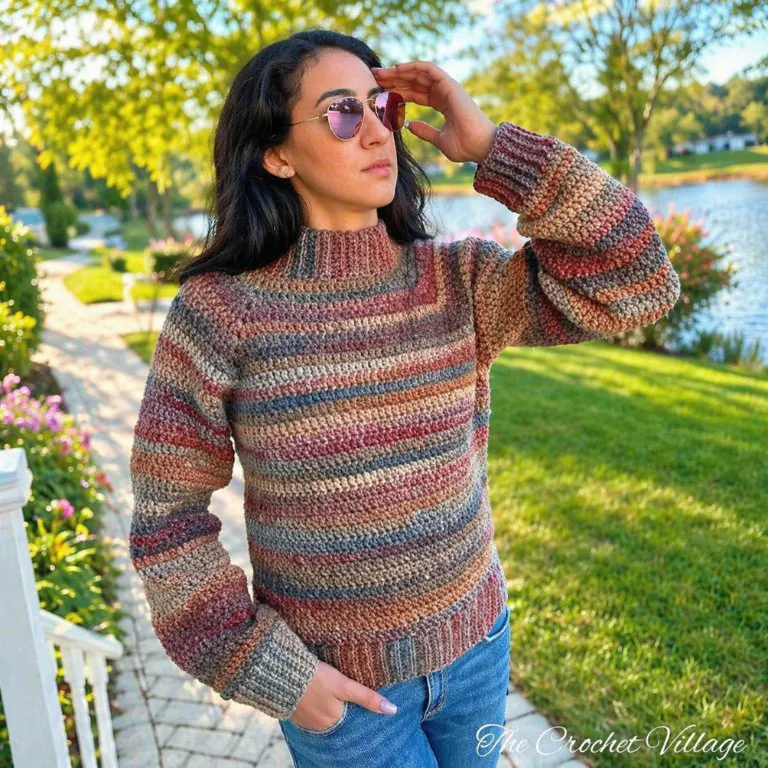
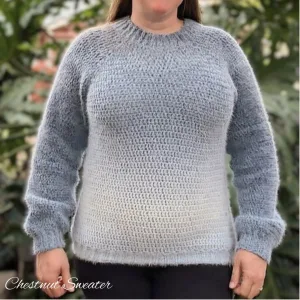
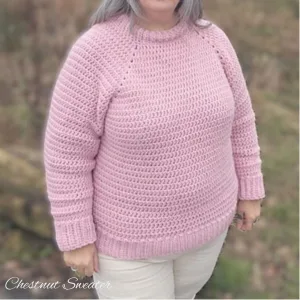
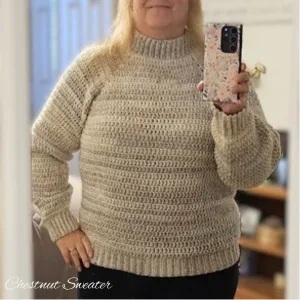
The Chestnut Sweater is a free beginner-friendly crochet sweater pattern worked top-down with a classic raglan style—no sewing required. Designed for comfort and simplicity, this warm pullover is available in sizes XS–2XL and is the perfect project for crocheters ready to make their first garment.

New to garment crochet? You’re in the right place. I’m so excited to share this gorgeous, easy, top-down crochet raglan sweater with you!
The Chestnut Sweater is warm, comfortable, and has just the right amount of drape. Because it’s worked seamlessly from the neckline down, it comes together faster than you’d expect — and there’s no seaming to deal with at the end. Every size from XS to 2XL has been tested for fit, so whether this is your very first sweater or another cozy pullover for the rotation, you’re covered.

Why You’ll Love This Raglan Sweater
There’s a reason raglan sweaters are the go-to starting point for garment crochet — the shaping is simple, the fit is forgiving, and you get to see your sweater take shape as you go. The Chestnut Sweater leans into all of that, with a relaxed silhouette, ribbed cuffs and hem, and a soft mock neck that finishes everything off beautifully. It’s the kind of pullover you’ll reach for on repeat all season
- Easy to make — built on simple, repetitive stitches with straightforward raglan increases. If you can chain, single crochet, and double crochet, you can make this sweater.
- Easy to adjust the fit — because it’s worked from the top down, you can try it on as you go and adjust the body length, sleeve length, and ease to suit you.
- No sewing required — it’s worked seamlessly in one piece, so there’s no seaming and no weaving in ends at the end.
- Sizes XS to 2XL — every size was tested by real crocheters, with a full sizing chart and finished measurements included.
- It looks fantastic — the raglan lines are clean and flattering, and a self-striping or variegated yarn does all the color work for you with zero effort.
Easy Top-Down Crochet Sweater: My Yarn Pick
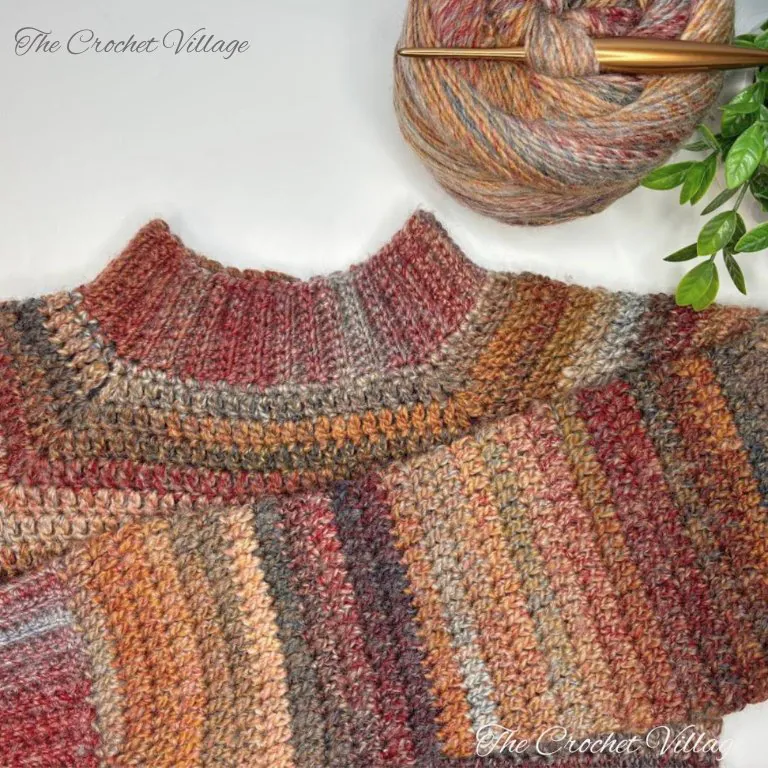
The right yarn can make all the difference in how your sweater turns out! For this pattern, I used a gorgeous #5 bulky yarn that’s on the thinner side, working more like a medium-weight yarn. It’s soft, lightweight, and has just the right amount of drape, making it perfect for a cozy yet flattering fit.
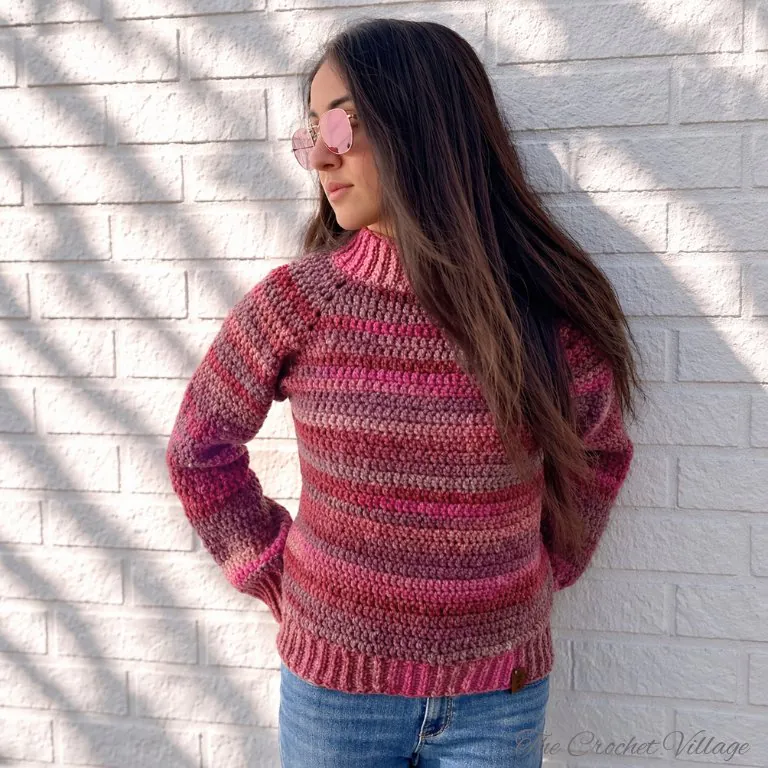
Below you’ll find everything you need to make the Chestnut Sweater: yarn recommendations, gauge and swatching guidance, full sizing charts, and tips for adjusting the fit as you go. The complete pattern is free right here on the blog — just keep scrolling.
Prefer a printable version? If you’d rather work from a clean, well-formatted PDF, you can grab it for a small fee in my shops linked below. It’s ad-free, includes color photos, and every size is color coded — so you can follow your size straight through the pattern without second-guessing which number is yours. Yours to keep, print, and take with you wherever you crochet.
Prefer A Printable PDF?
Treat yourself to the ad-free, beautifully formatted version of this design for a small fee!
Easy Top-Down Crochet Sweater Pattern- Start Here
Recommended Yarn: Caron Macchiato Cakes #5 bulky weight yarn. Color shown: Boundless.
- This #5 bulky yarn is on the thinner side. # 4 medium-weight yarns will also work, if you meet the gauge.
- Choose a soft yarn with good drape for the best results. Avoid stiff yarns, as they can affect the fit and look of the sweater.
Yarn Substitution: These yarns are a close match, but you should always swatch.
- Lion Brand Scarfie Yarn
- Caron Latte Cakes Self-Stripping Yarn
- Caron Colorama Halo Cake Yarn
- Lion Brand Ferris Wheel Yarn
- Red Heart Unforgettable Yarn
Yardage: See sizing chart.
Crochet Hooks
- (H)5 mm for the ribbing
- (K)6.5 mm hook for the body
Gauge:
- For the body, my gauge is: 4”x 4”/ 6.5 mm hook = 11 DC and 8 rows
- For the ribbing, my gauge is: 2”x 2”/ 5 mm hook = 8 SC BLO and 8 rows.
- Meeting gauge is essential for this pattern. If your gauge is off, your sweater may turn out too small or too large.
Other Materials
- Tag: Faux leather tags
- Stitch markers.
- Measuring tape.
- Tapestry needle.
- Scissors.
Abbreviations
- CH: Chain
- ST: Stitch
- SC: Single crochet
- HDC: Half double crochet
- DC: Double crochet
- SL ST: Slip stitch
- BLO: Back loop only
- DC2tog: Double crochet two together
- V-ST: V-Stitch
- Rnd: Round
- RS: Right side
- SP: Space
- Rep: Repeat
Special Stitches
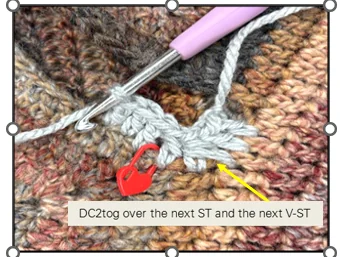
- DC2tog: YO, insert hook in next ST, pull up a loop, YO, pull through 2 loops, YO, insert hook in next ST, pull up a loop, YO, pull through 2 loops. You have 4 loops on the hook, YO, pull through all loops.
- V-Stitch (V-ST): 2 DC, CH 1, 2 DC in the same ST.
Pattern Notes
- Terminology: Written in US terms
- Difficulty: Easy to intermediate
- The yarn: The yarn used in this pattern is a thinner bulky-weight yarn that works similarly to a #4 medium-weight yarn and has a beautiful drape. For best results, choose a soft yarn with good drape and avoid stiff yarns, which can affect the fit and look of the sweater.
Find your size
- The measurements are taken with the garment laid flat before wear.
- The model is 5’8″ with a 34″ bust and is wearing a size small.
- For the best fit, use your bust measurement and select the closest size from the table below. If you prefer a looser fit, consider sizing up.
- The stitch count and number of rows for each size can be found in parentheses in the corresponding color: XS (S, M, L, XL, 2XL). Color-coded sizes are available in the premium version only.
- The numbers at the beginning of the rows are your row count for all sizes.
- The numbers at the end of the rows are your stitch counts for all sizes.
- The yardage may vary if you use a different yarn or adjust the length or width of the sweater.
Click here for the sizing chart!
| Size | To Fit Bust Size | Width (underarm to underarm) | Total Length (including collar) | Sleeve Length (underarm to cuff) | Approximate Yardage |
| XS | 28”- 30” | 16” | 19” | 17” | 734 yds |
| S | 32”- 34” | 18 ½” | 19” | 19” | 781 yds |
| M | 36”- 38” | 19 ½” | 20” | 19” | 954 yds |
| L | 40”- 42” | 21” | 20” | 19 ½” | 1129 yds |
| XL | 44”- 46” | 22 ½” | 21” | 20” | 1327 yds |
| 2XL | 48”- 50” | 25” | 21” | 20 ½” | 1447 yds |
Construction Overview
This sweater is crocheted top-down in raglan style, beginning at the center back:
- Collar: Crochet a band in rows, then join the ends to form a circle. This becomes the base of the raglan.
- Raglan setup: Divide the stitches into four sections — front, back, and two sleeves — using V-stitches to mark the corners.
- Yoke: Work in continuous rounds, increasing with V-stitches at each corner to shape the sweater.
- Body: Separate the body from the sleeves, then work the body in continuous rounds to your desired length.
- Sleeves: Return to each armhole and crochet the sleeve in rounds directly around the opening.
Free Crochet Raglan Sweater Pattern
Step 1- Crochet the collar
- Numbers for each size are shown in the same color throughout the pattern: XS (S, M, L, XL, 2XL).
- Numbers in black apply to all sizes.
Row 1: With a 5 mm hook, CH 11. SC in the 2nd CH from hook and in each CH across, turn. (10)
Row 2: CH 1, SC in the same ST, SC BLO in the next 8 ST, SC in the last ST, turn. (10)
Rows 3–68: Repeat Row 2. Do not fasten off at the end of the last row.
Note: For all sizes, the collar should measure 17½” long and 2½” wide before stretching, with 68 rows required. It will stretch to fit a 23″ head circumference.
- If the ribbing is longer than 17½”, the collar may be loose—tighten your tension.
- If it’s shorter than 17½”, the collar may be tight—loosen your tension slightly.
Join the Ribbing
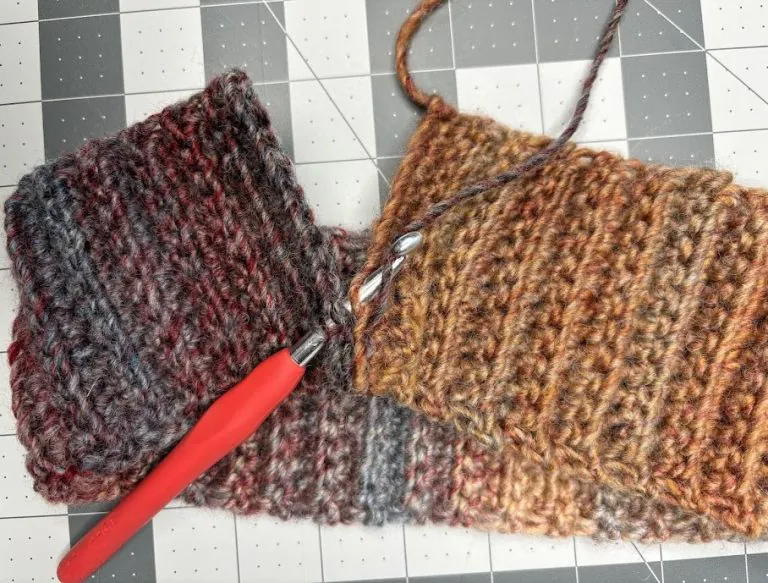
- Fold the ribbing in half and line up the two ends. SL ST through both layers, working into the 1st ST (BLO) on one side and the 1st foundation CH on the other side.
- Continue to SL ST into each ST (BLO) and the opposite CH of the foundation chain from the other edge.
- When you reach the end, remove your hook from your work and flip the ribbing so that the seam is on the inside. This will now be the right side of your work.
Step 2 – Crochet the yoke
Note: The Chestnut Sweater follows standard body measurements from the Craft Yarn Council, and all sizes have been tested for fit. But since everybody is unique—whether you have narrower shoulders, shorter arms, or a longer torso—and you may be using a different yarn, I’ve included tips to help you adjust the pattern if needed. Be sure to try on your sweater as you go and make any adjustments for the perfect fit!
Rnd 1: (RS) With a 6.5 mm hook, CH 1, SC in each row of the ribbing (visible holes). (68 SC)
Do not join with a SL ST. From now on, you will crochet continuously.
Rnd 2 (set-up round): SC in the next ST (this will be the middle of the back section—place a ST marker here and move it up each round), HDC in the next ST, DC in the next 7 ST, 2 DC in the next ST, CH 1, 2 DC in the next ST, DC in the next 12 ST (right sleeve), 2 DC in the next ST, CH 1, 2 DC in the next ST, DC in the next 18 ST (front), 2 DC in the next ST, CH 1, 2 DC in the next ST, DC in the next 12 ST (left sleeve), 2 DC in the next ST, CH 1, 2 DC in the next ST, DC in the next 9 ST.
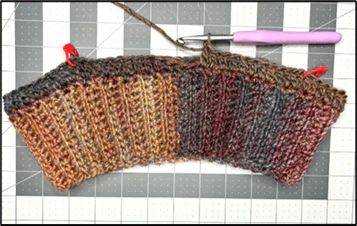
Rnd 3: DC in next 11 ST, V-ST in next CH-1sp, DC in next 15 ST (sleeve), V-ST in next CH-1sp, DC in next 21 ST (front), V-ST in next CH-1sp, DC in 15 ST (sleeve), V-ST in next CH-1sp, DC in next 10 ST.
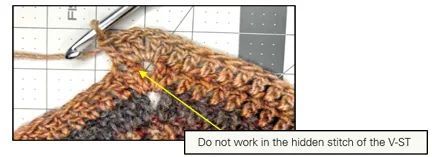
Rnd 4: *DC in each ST until you reach the next CH-1sp, V-ST in the CH-1sp,* rep *to* around. You should have: (24,18, 24,18) ST (front, sleeve, back, sleeve). Do not count the V-ST.
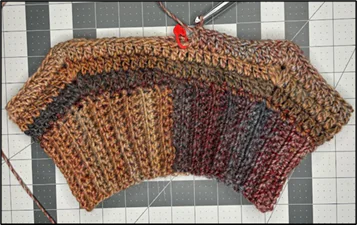
Row 5 – Row 9 (11, 11, 12, 12, 13): Rep Row 4. End the last row in the middle back (marked stitch). At the end of the last row of the yoke, you should have: (sleeve, front, sleeve, back): Rnd 9: (33, 39, 33, 39), Rnd 11: (39, 45, 39, 45), Rnd 11: (39, 45, 39, 45), Rnd 12: (42, 48, 42, 48), Rnd 12: (42, 48, 42, 48), Rnd 13: (45, 51, 45, 51)
✱ Each section (sleeve, front, sleeve, back) will increase by 3 ST every row, adding a total of 12 ST per row. The Stitch Count Tracker is available in the premium version only!
Step 3 – Separate body and sleeves
For a perfect fit: Each size covers a 2″ range (e.g., 28″–30″, 32″–34″), so the fit can vary depending on where your bust measurement falls within that range. Try on your sweater as you go and adjust the number of underarm chains if needed.
Rnd 10 (12, 12, 13, 13, 14): DC in each ST across until you reach the next CH-1 sp, DC in the CH-1 sp, CH 1 ( 2, 4, 6, 8, 10), skip over the sleeve section to the next CH-1 sp, DC in the CH-1 sp, DC in each ST across until you reach the next CH-1 sp, DC in the CH-1 sp, CH 1( 2, 4, 6, 8, 10), skip over the sleeve section to the next CH-1 sp, DC in the CH-1 sp. Continue crocheting into the next round. You should have: 90 (104, 108, 118, 122, 132).
Note:
- Remember not to work in the hidden stitch of the V-ST.
- Try on your sweater here, if possible, and adjust the number of chains under the armpit for a perfect fit.
- For a longer torso, add an extra row to the yoke.
- If your yarn is thick and stiff, the yoke may look bulky and fold under the arm. Try adding a round or two to the yoke and removing the underarm chains—a longer yoke helps prevent folding.
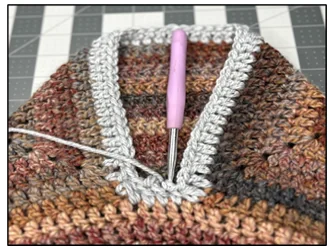
Rnd 11(13, 13,14, 14, 15) — Rnd 28 (31, 31, 32, 33, 33), or to your desired length:
DC in each ST around, including the underarm CHs.
On the last round, when you reach the middle back (the marked ST), continue with DC in each ST until 3 ST remain before the corner. Then HDC in the next ST, SC in the next ST, and SL ST into the corner ST. Do not fasten off—switch to a 5 mm hook and crochet the bottom ribbing next.
For a perfect fit: Try on the sweater as you go and adjust the length if needed, keeping in mind that the bottom ribbing adds about 2″ to the finished length.
Step 4 – Crochet the Bottom Ribbing
Row 1: With a 5 mm hook, CH 11. SC in the 2nd CH from hook and in each CH across; skip the next ST on the body edge, SL ST in the next 2 ST on the body edge, CH 1, turn. (10 ST)
Row 2: Skip the next 2 SL ST, SC BLO in each ST across until 1 ST remains, SC in the last ST, CH 1, turn. (10)
Row 3: SC BLO in each ST across, skip the next ST on the body edge, SL ST in the next 2 ST on the body edge, CH 1, turn. (10)
Rows 4–90 (104, 108, 118, 122, 132): Rep: Repeat Rows 2–3, ending with Row 2.
At the end of the last row, CH 1, and with the RS facing, SL ST both ends of the ribbing together, one ST at a time. Fasten off and weave in the ends.
Step 5 – Crochet the sleeves
Return to the sleeve and work directly around the armhole opening. Crochet all rounds continuously using the 6.5 mm hook.
Rnd 1: (RS) Join with a SL ST in the remaining loops of the 1st (1st, 2nd, 3rd, 4th, 5th) CH of the CH-1 (2, 4, 6, 8, 10) at the underarm. CH 2, DC in the same ST as the SL ST, DC in the next 0 (1, 2, 3, 4, 5) ST, DC2tog over the next ST and the next V-ST, DC in each of the next 42 (42, 42, 51, 51, 54) ST, DC2tog over the next V-ST and the next ST, DC in the next 0 (0, 1, 2, 3, 4) CH. Crochet continuously.
Rnd 2: SC in the 1st ST (place a ST marker here), HDC in the next ST, DC in each ST around. Crochet continuously. You should have: 45 (46, 48, 53, 55, 58) ST
For a perfect fit: For larger sizes, check the sleeve length for your size and compare it to your arm. If you need to shorten the sleeve, it may end up wider at the wrist. To adjust, decrease every round until you reach the desired width, then continue crocheting straight without decreases.
Rnd 3: DC2tog over the first 2 ST, DC in each ST around.
Rnd 4: DC in each ST around.
Rnd 5 – Rnd 28 (29, 29, 29, 30, 30) or to your desired length: Repeat Rnds 3–4 until you have 32 (32, 34, 39, 41, 44) ST remaining. Then crochet without any decreases for the remaining rounds.
On the last round, DC in each ST until 2 ST remain before the marked stitch. Then HDC in the next ST, SC in the next ST, and SL ST in the marked stitch. Do not turn—proceed with the ribbing next.
Note: For larger sizes, you can adjust the sleeve width at the wrist by decreasing a few more ST in the last round.
Step 6 – Crochet the sleeve ribbing
Row 1: With a 5 mm hook, CH 11. SC in the 2nd CH from hook and in each CH across; skip the next ST on the sleeve edge; SL ST in the next 2 ST on the sleeve edge, CH 1, turn. (10 ST)
Row 2: Skip the next 2 SL ST, SC BLO in each ST across until 1 ST remains, SC in the last ST, CH 1, turn. (10)
Row 3: SC BLO in each ST across, skip the next ST on the sleeve edge, SL ST in the next 2 ST on the sleeve edge, CH 1, turn. (10)
Rows 4–32 (32, 34, 39, 41, 44): Repeat Rows 2–3, ending with Row 2.
At the end of the last row, CH 1, and with the RS facing, SL ST both ends of the ribbing together, one ST at a time. Fasten off.
Weave in all ends, and you’re all done!
I offer full support to help you with any questions or challenges you might have. Feel free to drop your comments in the section below or join our Facebook group, where I, along with my wonderful testers and community members, will be more than happy to assist you!