Learn how to crochet a simple and stylish slouchy hat with this free crochet pattern. The Symphony Hat is quick, beginner-friendly, and includes adjustable sizing for adults, teens, and kids. A perfect project for leftover yarn and endless color combos!
I’m so excited to share this free crochet slouchy hat pattern with you today! The Symphony Hat is such a pretty and simple crochet beanie—perfect for keeping warm in style. It has that relaxed, comfy look we all love, making it great for everyday wear, whether you’re heading out or just cozying up at home.
This pattern is quick and easy, and it is a great choice for beginners and beyond. You’ll crochet it from the bottom up, starting with a snug, stretchy brim that feels soft and comfortable. The hat is designed to fit adults, teens, and children, and I’ve included easy instructions to adjust the size for a perfect fit, so it works for everyone!
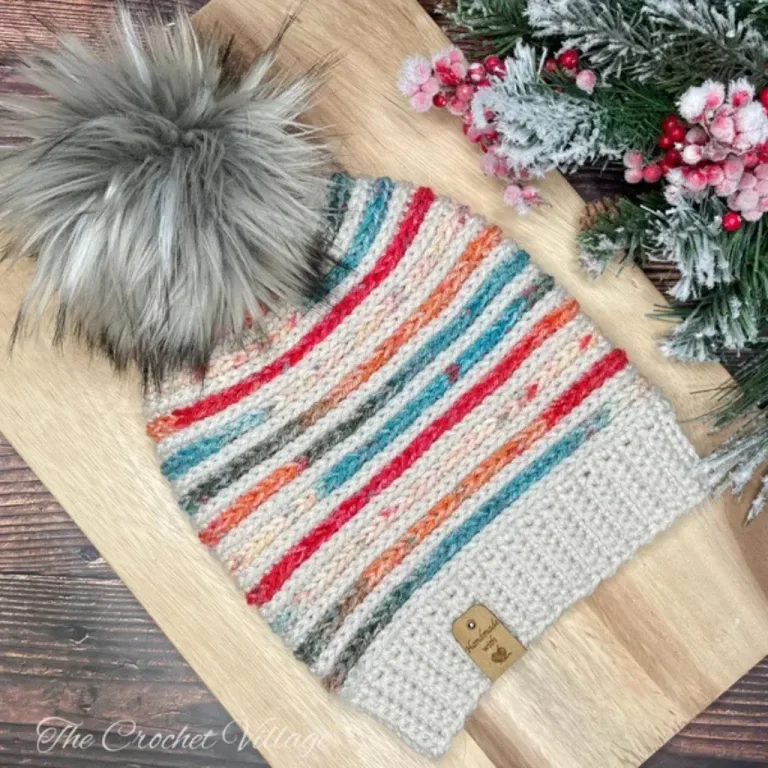
For my Symphony Hat, I used a #4 weight variegated yarn paired with a matching solid, and the colors worked beautifully together. The color options are endless, so feel free to get creative with your own combination.
This pattern is also a great way to use up leftover yarn and turn your scraps into something cozy and stylish.
Keep reading to find the free pattern, or if you prefer a printable add-free PDF, you can find it on Etsy, Ravelry, and my online store!

Easy Slouchy Hat Free Crochet Pattern- Start Here
Recommended Yarn: 🧶Hobby Lobby’s I Love This Yarn, #4 Worsted weight yarn. Colors shown:
- Linen. I will refer to it as Yarn A.
- Royal Gorge. I will refer to it as Yarn B.
Yardage:
- Child size: 103 yd
- Teen size: 175 yd
- Adult size: 195 yd
Yarn Substitution: These yarns are a close match, but it’s always best to swatch.
- Red Heart Super Saver Bitty Stripes
- Lion Brand Yarn Mandala Ombré
- Lion Brand Yarn Ferris Wheel Yarn
- Bernat Super Value Yarn Ombre
- Premier Yarns Anti-Pilling Everyday Worsted
- Universal Yarn Uptown Worsted
Crochet Hooks
- (H) 5mm for the brim
- (J) 6mm for the body
Other Materials
- Pom-pom: 6”pom-pom
- Tag: Faux leather tags
- Tapestry needle to weave in ends.
Gauge: 4” square/ 6mm hook = 14 rows and 15 SC
Abbreviations
- ST: Stitch
- SL ST: Slip stitch
- SC: Single crochet
- HDC: Half double crochet
- HDC DEC: Half double crochet decrease
- YO: Yarn over
- Rnd: Round
- Rep: Repeat
Special stitches
- 3rd Loop of a half double crochet is in the back of the HDC. You can find it by tilting the work towards you slightly and looking behind the front and back loops. Watch this video if you need visual guidance.
- Half double crochet decrease (HDC DEC): YO, insert the hook into the ST, pull up a loop, YO, insert the hook into the next ST, pull up a loop, YO, pull through all loops.
Pattern notes
- This pattern is written in US terms.
- The skill level is easy.
- This hat is crocheted from the bottom up, in rows for the brim and in continuous rounds for the body.
- The hat is made in three sizes: child, teen, and adult.
- If you want to make the hat in another size, crochet the brim to fit around the head, slightly snug but still comfy. Then follow the pattern and crochet until you reach the desired length, stopping about 1″ before it’s done. After that, make the decrease rows as shown in the pattern.
- If you cannot match the gauge, you will need to adjust the stitches around the body of the hat, the number of rows, and possibly the brim length.
Changing colors
In this pattern, you will need to change colors at the end of each round: yarn over with the old yarn, insert the hook in the half double crochet 3rd loop of the last stitch, pull up a loop, yarn over with the new yarn, and pull through the loops on your hook. Drop the old yarn and continue with the new yarn. The old yarn will remain at the end of the row until you need to use it again. Check out this YouTube video for step-by-step instructions.
Because you are working with different colors, the seam can be noticeable. But it will be in the back of the hat, and since the hat is slouchy, it won’t show.
However, if you’d like to make the seam smoother and less noticeable, I recommend joining the rounds with an invisible slip stitch, then CH1. Just make sure the joining slip stitch is a little tight to keep everything nice and neat.
Sizes and measurements
The pattern provides instructions for:
- Child ages 3-10 or head circumference of 19”-20”: Hat height is 9” x 8 1/2” wide.
- Ages 11 & up or head circumference of 20”-22”: Hat height is 9 1/2” x 9” wide.
- Adult large or head circumference of 23”-24”: Hat height is 10 1/2” x 10” wide.
- The numbers in parentheses at the beginning of the rows are your row count for all sizes.
- The numbers in parentheses at the end of the rows are your stitch counts for all sizes.
- If you want to make the hat in another size, crochet the brim to fit around the head, slightly snug but still comfy. Then follow the pattern and crochet until you reach the desired length, stopping about 1″ before it’s done. After that, make the decrease rows as shown in the pattern.
Free Crochet Slouchy Hat Pattern: Symphony Hat
In this free crochet slouchy hat pattern, I’ll walk you through everything you need to make your very own Symphony Slouchy Hat! Prefer a printable, ad-free version? You can grab the PDF for a small fee in any of my shops linked below!
Prefer A Printable PDF?
Treat yourself to the ad-free, beautifully formatted version of this design for a small fee!
Step 1- Crochet the brim
Row 1: With a 5 mm hook and Yarn A, CH 9 (same for all sizes). SC in the 2nd CH from hook and in each CH across, CH1, turn. (8)
Step 5 – Finish your hat
Once you finish the last round, cut the yarn, leaving a 6”-8” tail. Use the long tail to weave the hole at the top of the hat closed.
Weaving all ends, attach a pom-pom and a tag, and you’re all done!
I offer full support to help you with any questions or challenges you might have. Feel free to drop your comments in the section below or join our Facebook group, where I, along with my wonderful testers and community members, will be more than happy to assist you!