New to garment crochet? This gorgeous, beginner-friendly free crochet long cardigan pattern is just what you need! Long, cozy, and effortlessly stylish, it’s made in one piece with no sewing required—perfect for a stress-free project you’ll love to create and wear!

I’m excited to share my Rubi Cardigan free crochet pattern with you! This no-sew, simple top-down long crochet cardigan is super easy to make, works up quickly, and fits beautifully in sizes XS to 2XL—making it a fantastic project for both beginners and seasoned makers alike. I designed it with simplicity in mind, using basic single crochet stitches and just a touch of shaping.
With its simple raglan style and minimal shaping, the Rubi Cardigan is a great introduction to crochet garment-making. You’ll build your confidence stitch by stitch—all while crafting a cozy, stylish long cardigan that you’ll be proud to wear. And don’t worry, I’ll be there to guide you step by step along the way! 😊
Related: Crochet photography.
Keep reading to find the free pattern, or if you prefer a printable add-free PDF, you can find it on Etsy, Ravelry, and my online store!
Simple Top-down Crochet Cardigan: Seamless Raglan Construction
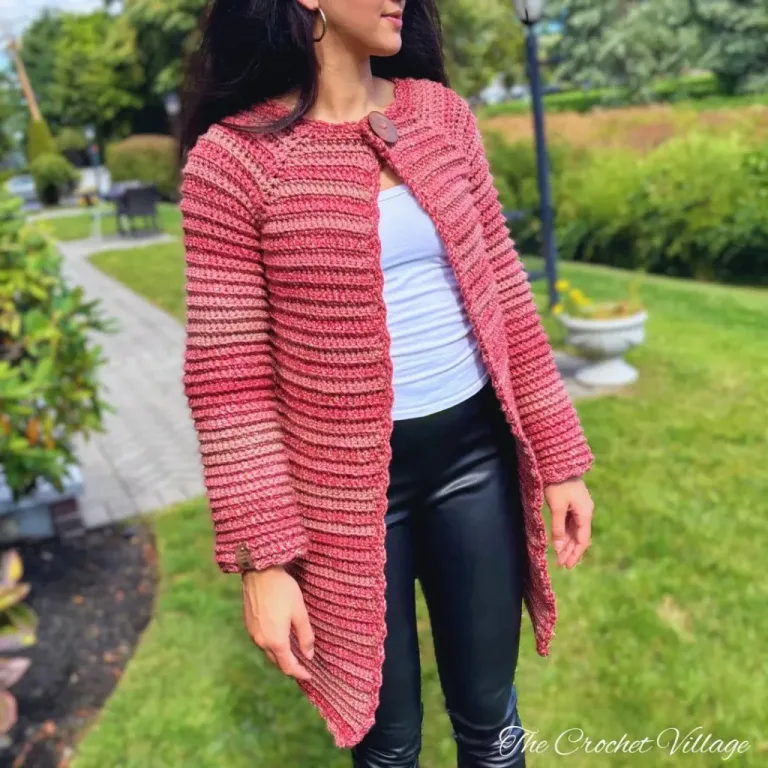
This simple top-down crochet cardigan pattern is crafted seamlessly in a charming raglan style. The sleeves are worked directly from the body with no decreases—easy peasy! The Rubi Cardigan is finished with a beautiful edging that gives it a polished look and brings the design together.
I love the long cardigan; it’s a warmer option and a great choice for winter in New England. Plus, it has an elegant feel, but if you prefer a shorter or even a cropped version, it’s easy to adjust.
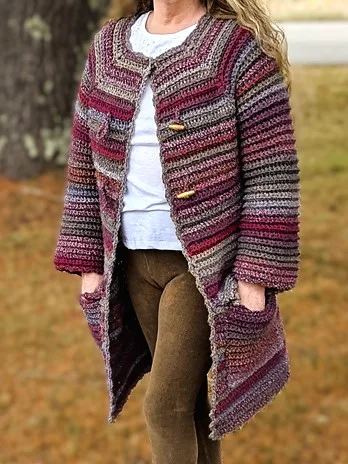
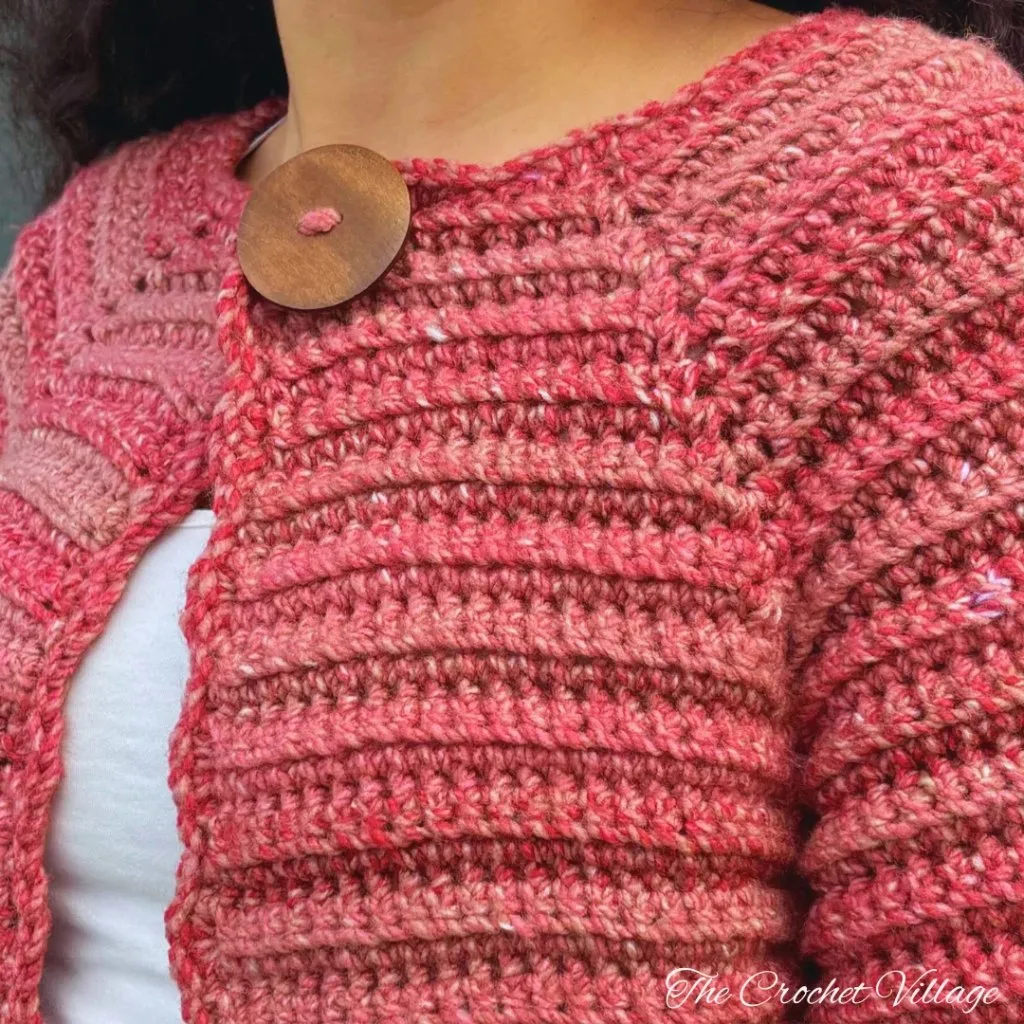
To close the cardigan, I opted for a discreet hook and eye closure and added a large button for an extra touch of style. For a fun twist, you might even add pockets, just like Angel did in her gorgeous version (you can check it out in my Ravelry shop.
Simple Top Down Crochet Cardigan: Soft and Trendy Yarn Options
For my Rubi Cardigan, I used a #5 bulky weight yarn in a gorgeous, on-trend color: Impressions by Loops & Threads. It’s incredibly soft, warm, and cozy—but not heavy at all! I absolutely love how the color and texture come together to create such a stylish and comfortable cardigan.
If you prefer a lightweight, heavenly soft, fluffy, and luxurious feel, Garnstudio DROPS Melody is a fantastic option (check out Caroline’s gorgeous cardigan below!). Caron Colorama Halo and Caron Latte Cakes Self-Striping Yarns are also great choices for a beautifully soft and airy look.
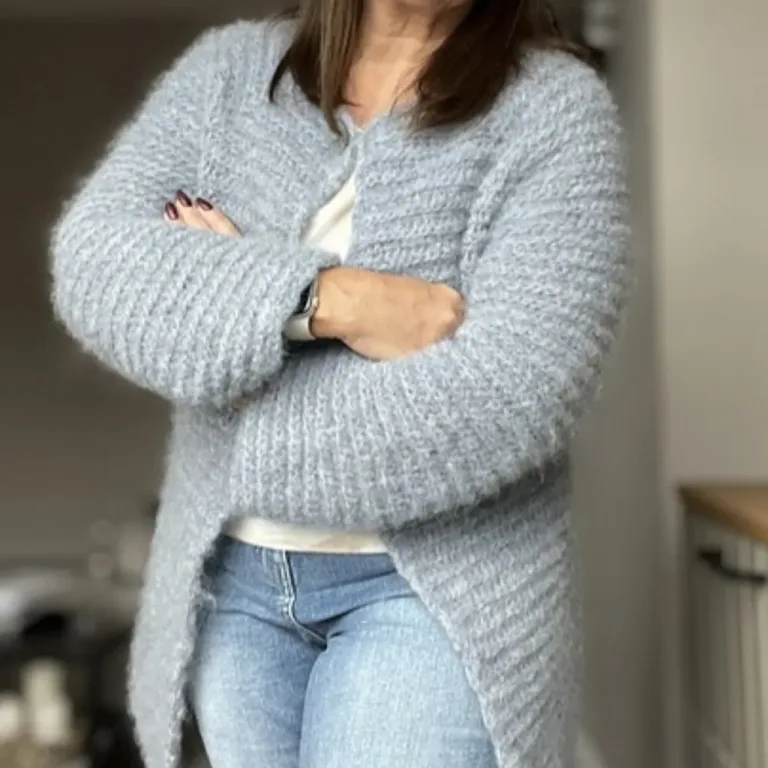
So, whether you’re looking for a textured warm cardigan or a lightweight, elegant layer, this simple top-down crochet cardigan has you covered! Just make sure to check your gauge before you start for the perfect fit. 😊
Simple Top-Down Crochet Cardigan: Start Here
Recommended Yarn: 🧶Impressions by Loops & Threads, #5 bulky weight yarn, color shown: Spicy Cinnamon
Yarn Substitution
These yarns are a close match, but you should always swatch.
- Premier Yarns Puzzle Yarn
- Lion Brand Yarn Scarfie Bulky Yarn
- Red Heart Gemstone Diamond Yarn
- Paintbox Simply Chunky
- Bernat Softee Chunky Ombre Yarn
Yardage: Depends on the size you are making, see details on the next page.
Crochet Hook: (L) 8mm or needed hook to meet the gauge.
Gauge: 4” square=11 rows and 12 SC BLO
Other Materials
- A pair of hook and eye closures
- Tag: Faux leather tags
- 2” wooden button
- Stitch markers.
- Measuring tape.
- Tapestry needle.
- Scissors.
Abbreviations
- CH: Chain
- ST: Stitch
- SC: Single crochet
- SL ST: Slip stitch
- BLO: Back loop only
- V-ST: V-Stitch
- SP: Space
- Rep: Repeat
Special Stitch
V-Stitch (V-ST): Place *SC, CH 2, SC* in the ST. Note: After the 1st row, place your V-ST in the CH-2 sp of the V-ST of the previous row.
Pattern Notes
- This pattern is written in US terms.
- Skill level is intermediate.
- The cardigan is worked from the top down in raglan style.
- The V-Stich doesn’t count as a ST in the entire pattern.
Construction
- This Cardigan is crocheted seamlessly from the top down.
- Start with the neckline: Chain the foundation chain – Same for all sizes.
- Divide for the raglan structure: Divide the stitches into five sections: front–right, sleeve, back, sleeve, and front –left. Use V-stitches to mark the corners.
- Work the yoke: Crochet in rows, back and forth from mid-front, making increases (V-stitches) at the corners to expand the yoke.
- Separate the body and sleeves and work the body in rows until you reach the desired length.
- Return to the sleeve. Attach the yarn in the armpit and work the sleeve back and forth in rows from the join. Join the rows with a SL ST at the end of each row.
- Crochet the edging around the entire opening of the jacket and the sleeves.
Step 1 – Swatch your gauge
Meeting the gauge is essential when working on a garment. If your gauge is off, the final cardigan may end up too small or too large. Instructions on how to check your gauge and adjust your hook size are included in the premium version only. My swatch is: 4″ square=11 rows and 12 SC BLO.
Related: How to Check Your Crochet Gauge: Step-by-Step Guide
Step 2 – Find your size
- The measurements are taken with the garment laid flat before wear.
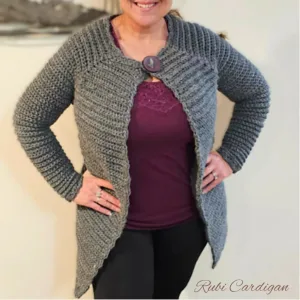
- The model is 5’8″ with a 34″ bust and is wearing a size small.
- For the best fit, use your bust measurement and select the closest size from the table below. If you prefer a looser fit, consider sizing up.
- The stitch count and number of rows for each size can be found in parentheses in the corresponding color: XS (S, M, L, XL, 2XL). Color-coded sizes are available in the premium version only.
- The numbers at the beginning of the rows are your row count for all sizes.
- The numbers at the end of the rows are your stitch counts for all sizes.
- The yardage may vary if you’re using a different yarn or adjusting the length or width of the cardigan.
Click here for the sizing chart
| Size | Bust Size | Width (underarm to underarm) | Total Length | Sleeve Length (underarm to cuff) | Yardage |
| XS | 28”- 30” | 16 1/4” | 33” | 16” | 4 skeins/ 984 yds |
| S | 32”- 34” | 18” | 35” | 18” | 5 skeins/ 1230 yds |
| M | 36”- 38” | 19 ¾” | 35” | 18” | 6 skeins/ 1300 yds |
| L | 40”- 42” | 21 ½” | 35” | 18” | 6 skeins/ 1380 yds |
| XL | 44”- 46” | 23” | 35” | 18 ½” | 6 skeins/ 1476 yds |
| 2XL | 48”- 50” | 25” | 35” | 18 ½” | 7 skeins/ 1700 yds |
Rubi Crochet Long Cardigan Pattern
With this free crochet cardigan pattern, you’ll be able to create a simple, top-down long cardigan that you’re sure to love! But if you’d rather skip the ads and want a more convenient version, you can grab the ad-free, printer-friendly PDF from my shops linked below!
Prefer A Printable PDF?
Treat yourself to the ad-free, beautifully formatted version of this design for a small fee!
Step 3 – Crochet the yoke
Row 1: CH 61 to make a foundation chain (same for all sizes), SC in 2nd CH from hook, SC in next 7 ST (front–left), V-ST in next ST, SC in next 11 ST (left sleeve), V-ST in next ST, SC in next 18 ST (Back), V-ST in next ST, SC in next 11 ST (right sleeve), V-ST in the next ST, SC in next 8 ST (front –right), CH1, turn. Place stitch markers in the V-ST if needed. 56 STS total (V-ST are not counted)
Row 2: SC BLO in next 9 ST, V-ST in next CH-2 sp. You should have 9 SC (front-right)
- Skip next SC (last SC of the previous V-ST), SC BLO in next 12 ST, V-ST in next CH-2 sp. You should have 12 SC (sleeve)
- Skip next SC (last SC of previous V-ST, SC BLO in next 19 ST, V-ST in next CH-2 sp. You should have 19 SC (back)
- Skip next SC (the last SC of the previous V-ST), SC BLO in next 12 ST, V-ST in next CH-2 sp. You should have 12 SC (sleeve).
- SC BLO in next SC ( last SC of previous V-ST, SC BLO in next 7 ST, SC in last ST, CH1, turn. You should have 9 SC (front-left).
Note: I included the ST count by section to help you keep track (available in premium version only), but the easy way is to crochet until you get to the V-ST, SC BLO in the 1st ST of the V-ST, skip the 2nd ST of the V-ST, and in the last section, crochet in both STS of the V-ST.
Row 3: SC BLO in next 10 ST, V-ST in next CH-2 sp. You should have 10 SC (front–right).
- Skip next SC (last SC of the previous V-ST), SC BLO in next 13 ST, V-ST in next CH-2 sp. You should have 13 SC (sleeve).
- Skip next SC (last SC of previous V-ST, SC BLO in next 20 ST, V-ST in next CH-2 sp. You should have 20 SC (back).
- Skip next SC (the last SC of the previous V-ST), SC BLO in next 13 ST, V-ST in next CH-2 sp. You should have 13 SC (sleeve).
- SC BLO in next SC (last SC of previous V-ST, SC BLO in next 8 ST, SC in last ST, CH1, turn. You should have 10 SC (front-left).
Row 4 – 19 (21, 23, 25, 27, 29): Rep Row 3, increasing 1 ST each section.
Below is the stitch count by section (front-left, sleeve, back, sleeve, front-right): Do not count the V-STs. Feel free to use the stitch count tracker (available in the premium version only).
Row 3: (10, 13, 20, 13, 10), Row 4: (11, 14, 21, 14, 11), Row 5: (12, 15, 22, 15, 12) … and so on. In the last row, you should have:
- Row 19: (26, 29, 36, 29, 26)
- Row 21: (28, 31, 38, 31, 28)
- Row 23: (30, 33, 40, 33, 30)
- Row 25: (32, 35, 42, 35, 32)
- Row 27: (34, 37, 44, 37, 34)
- Row 29: (36, 39, 46, 39, 36)
Step 4 – Separate body and sleeves
Full photo tutorial is available in the premium version only!
Row 20 (22, 24, 26, 28, 30) (Set-up row): SC BLO in next 27 (29, 31, 33, 35, 37) SC in next CH-2 SP, [skip over sleeve section to the next V-ST, SC in next V-ST, SC BLO in each ST across until you reach next V-ST38 (40, 42, 44, 46, 50), SC in next CH-2 SP, skip over sleeve section to the next V-ST, SC in next CH-2 SP, SC BLO until one ST remaining, SC in last ST, CH1 turn. You should have: 96 (102, 108, 114, 120, 126).
Note: Try on as you go! If you prefer a looser fit, add more rows to the yoke until you reach the desired width. You can also add 3–7 extra chains under each armpit. Work SC into each of the chains in the next round, then continue with the pattern.
Step 5 – Crochet the body
Row 21 (23, 25, 27, 29, 31) – Row 88 (92, 94, 94, 94) or to the desired length: SC BLO in each ST across until you have 1 ST remaining, SC in last ST, CH 1, turn. At the end of the last Row, DO NOT TURN, crochet the edge around the entire opening of the cardigan.
Edging: With the yarn still on your hook,*3 SC in next row, skip next row, SL ST in next row, skip next row* rep *to* until you reach next corner, 3 SC in the corner,*skip next ST, SL ST in next ST, skip next ST, 3 SC in next ST*, rep *to* until you reach next corner, SL ST in the corner,*3 SC in next row, skip next row, SL ST in next row, skip next row,* rep *to* until you reach next corner, SL ST in last row,*3 SC in next ST, skip next ST, SL ST in next ST, skip next ST*, rep *to * until you reach the staring 3 SC group, join with a SL ST into the 1st SC, fasten off.
Step 6 – Crochet the sleeves
Return to the sleeve and work directly around the armhole opening. The sleeve is worked back and forth from the starting ST. Note: The sleeve style is straight (no decreases). For the larger sizes, if you think the width of the sleeve is too wide at the wrist for your liking, consider decreasing 1 stitch every 3 rows, starting in row 4, by simply crocheting the last 2 stitches of the row together.
Row 1: (Set-up round) Slip knot with, SC in the V-ST, SC BLO in each ST around, SC in next V-ST, add 1 SC in the armpit space, join with SL ST into the 1st SC (you may use a ST marker here), CH1, turn. 39 (35, 37, 39, 40, 42) ST.
If you added CHs under the armpit for a looser fit, make a Slip knot, SC in the middle CH of the added CHs, SC in each ST across until you reach the V-ST, SC in the V-ST, SC BLO in each ST around, SC in the next V-ST, SC in the remaining CHs, join with SL ST into the 1st SC (you may use a ST marker here), CH1, turn.
Row 2- Row 45 (51, 51, 51, 51, 53) or to the desired length: SC BLO in each ST around, join with a SL ST into the 1st SC, CH1, turn. At the end of the last row, join with a SL ST, CH1, do not turn.
Last Row (edging): *Skip next ST, 3 SC in next ST, skip next ST, SL ST in next ST* rep *to* around ending with a SL ST in the join, fasten off.
Step 7 – Closure
- To close the cardigan, I used an eye and hook closure; the button is for embellishment only.
- On the wrong side of the cardigan, use a needle and yarn to sew the hook and eye closure in place. I used only one closure at the top corner, but feel free to use as many as you like along the opening of the cardigan.
- On the right side, sew the large button to the top right corner.
- Weave in all ends, and you are all done! 🙂
I offer full support to help you with any questions or challenges you might have. Feel free to drop your comments in the section below or join our Facebook group, where I, along with my wonderful testers and community members, will be more than happy to assist you!