The Tamara Scarf free crochet pattern is one of those projects I keep coming back to — and after making it three times in three different yarns, I finally decided it deserved a proper spot on the blog.
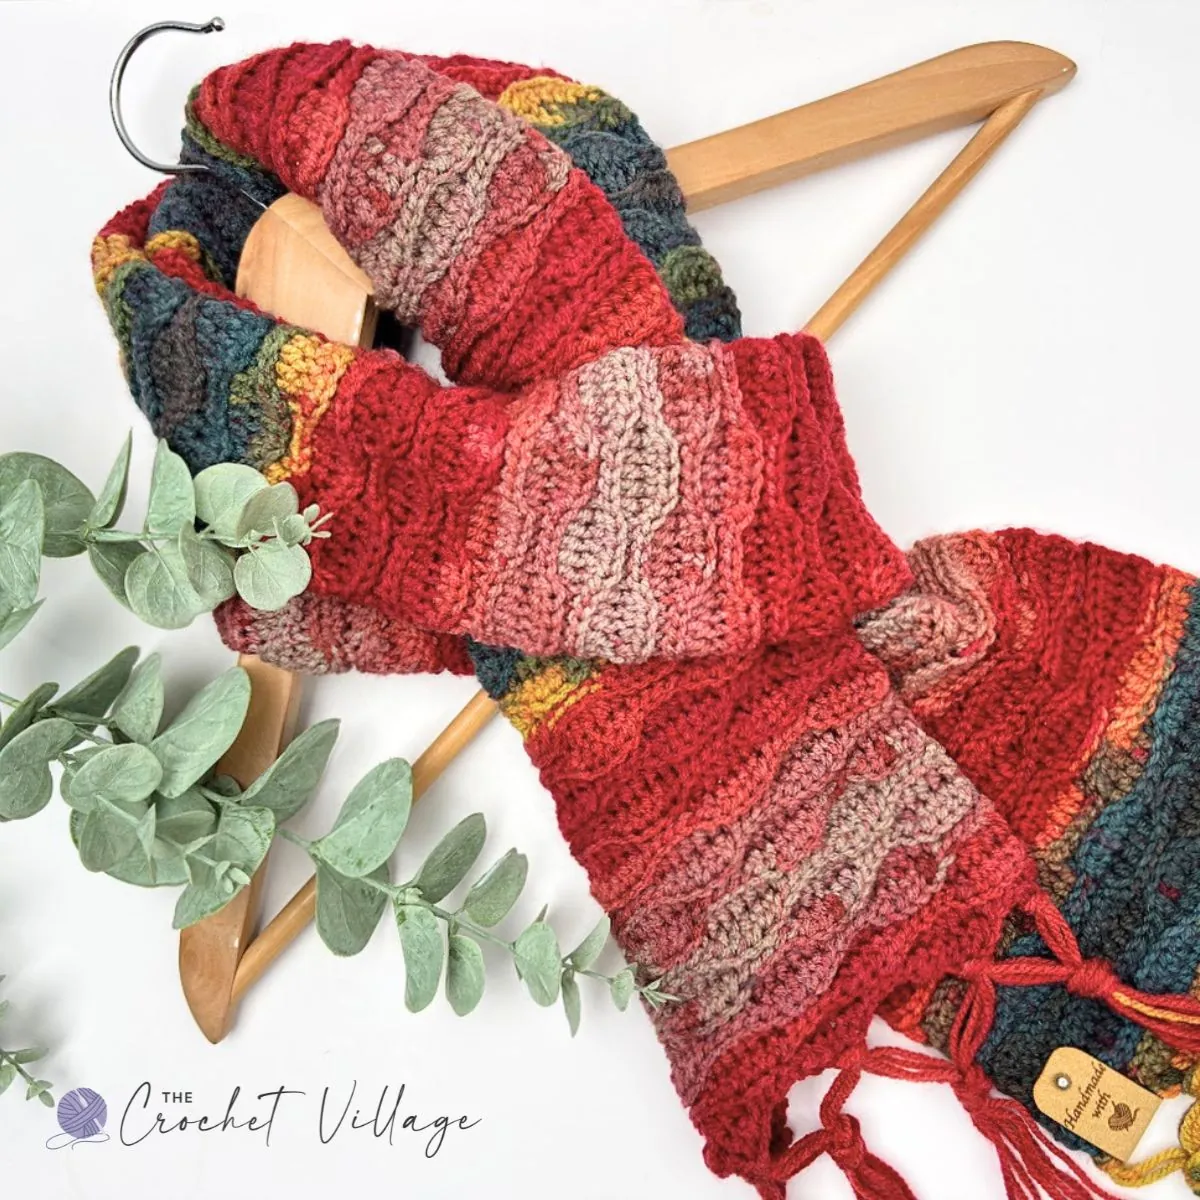
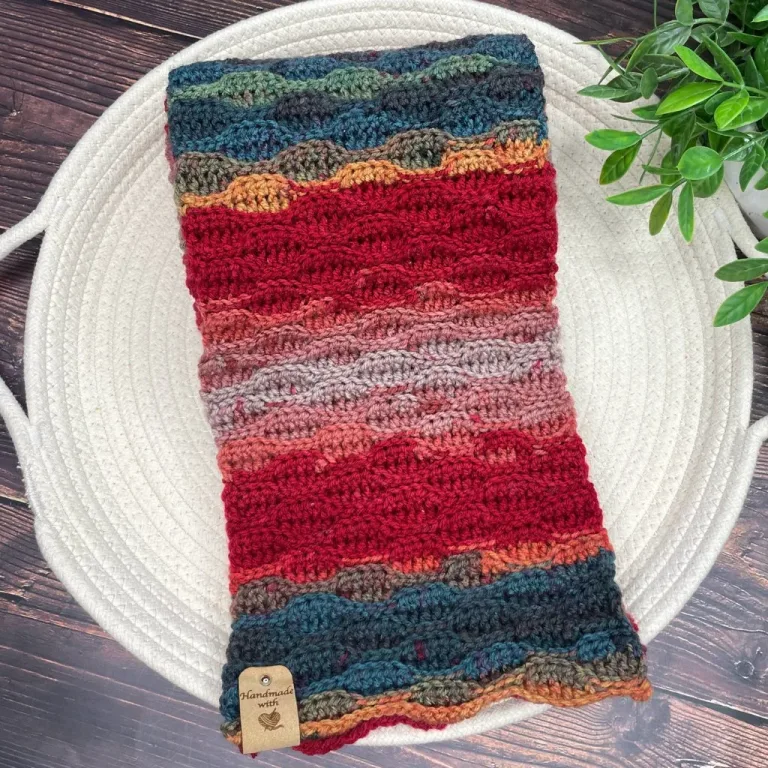
This free crochet scarf pattern makes a chic, modern, gorgeous scarf — all thanks to the bold variegated yarn that worked beautifully with the wave stitch.
I almost didn’t use the variegated yarn you see in these photos. It sat in my stash for about a year. I tried it with a few different stitches and the color changes always looked like a mess. Until I tried the wave stitch.
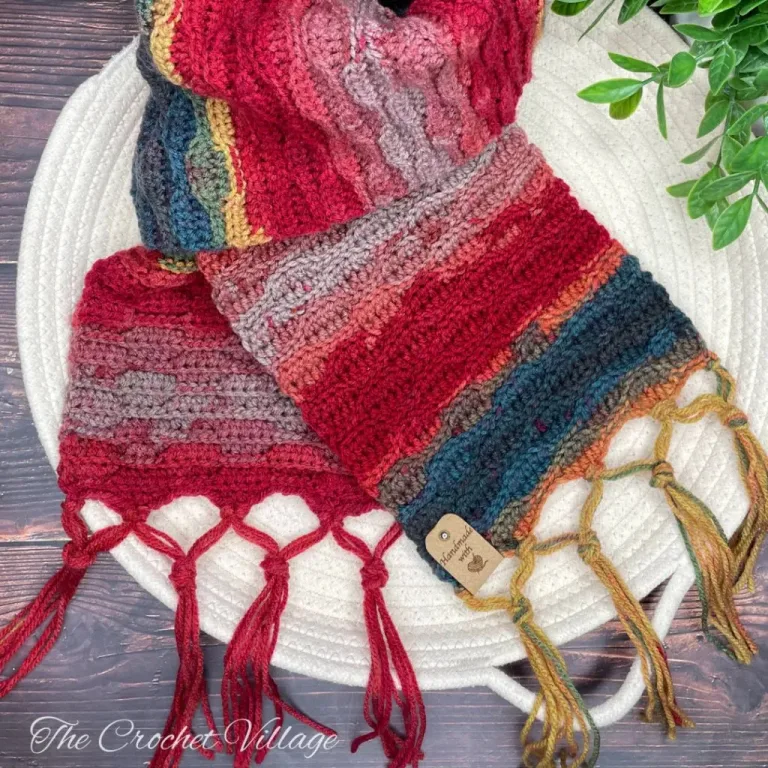
The wave stitch actually loves this color sequence. The reds, teals, and golds sneak through the stitches harmoniously, giving the scarf a stunning boho-chic look that’s unique and full of character. Which I love.
Everything you need to make your own Tamara Scarf is right here — yarn, hook, stitches, and full step-by-step instructions. Just keep scrolling for the free pattern. Prefer a printable version? A clean, ad-free PDF is available for a small fee in all my shops, linked below.
Prefer A Printable PDF?
Treat yourself to the ad-free, beautifully formatted version of this design for a small fee!
The Tamara Scarf works up in #3 lightweight yarn for a soft, easy-to-wear scarf that elevates any outfit. Throw it on with a white shirt and jeans and you look put together and stylish.
It’s warm without feeling bulky, which is honestly the reason this one lives on my coat hook instead of shoved in a drawer somewhere.
Oh, and this pattern isn’t only for scarves. The wave stitch works just as well for blankets, table runners, or whatever else you feel like making. There’s a half-finished table runner in cream cotton sitting in my project basket right now that might be my favorite version yet. (I’ll get to it. Eventually.)
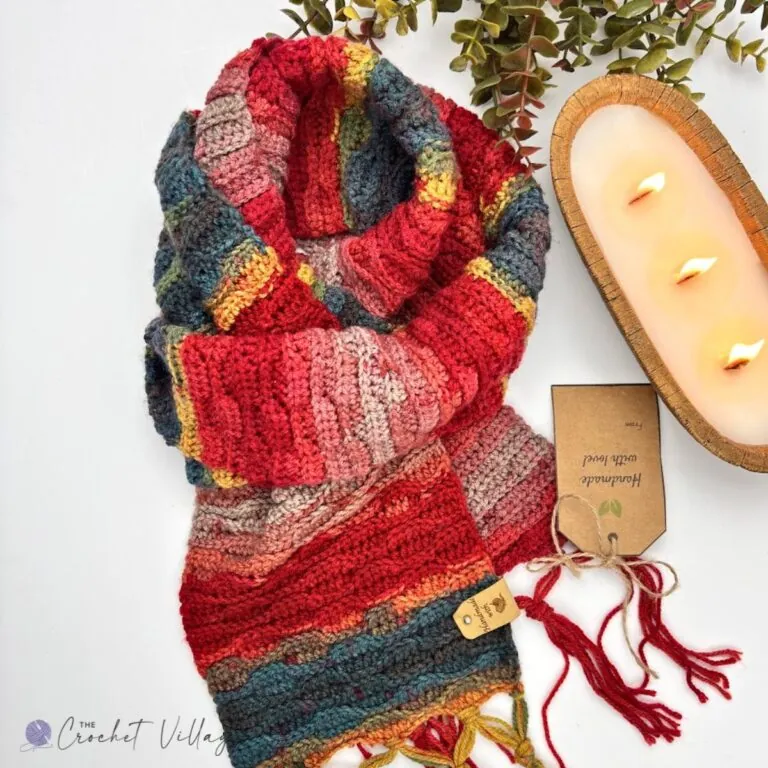
Free lightweight Crochet Scarf Pattern: Start Here
Recommended yarn: Any #3 lightweight yarn works. I used Premier ColorFusion DK Yarn
Color shown: Vintage
Yardage: 2 skeins, approximately 650 yd (596 m) total
Crochet hook: (G)- 4mm
Gauge: 4”x 4” = 16 rows of 20 ST (pattern stitch)
Yarn substitution
- Lion Brand Yarn Mandala Yarn
- Premier Yarns Anti-Pilling DK Colors
- Loops & Threads Facets Yarn
- Paintbox Yarns Simply DK
Other materials
- Tapestry needle to weave in ends
- Tag: Faux leather tags
- 8 ½” long cardboard for the tassels (optional)
Abbreviations
- CH: Chain
- ST: Stitch
- SLST: Slip stitch
- HDC: Half double crochet
- BLO: Back loop only
- Rep: Repeat
Pattern Notes
- Terminology: Written in US terms
- Difficulty: Easy to intermediate
Finished dimensions: The scarf measures 62” in length and 7 ½” in width.
How to adjust the size
To make the scarf in a different size, make a foundation chain in multiples of 5 + 1 stitches until you reach your desired width, then crochet until you reach your desired length.
Step 1 – Crochet the Scarf
CH 36 to make the foundation chain. The turning CH 1 does not count as a ST.
Row 1: SL ST in the 2nd CH from the hook and in each of the next 4 CH. * HDC in each of the next 5 CH, SL ST in each of the next 5 CH; repeat from * across. CH 1 and turn. (35 STS)
Row 2: * SL ST BLO in each of the next 5 STS, HDC BLO in each of the next 5 STS; repeat from * across until 5 STS remain. SL ST BLO in each of the next 4 STS, then SL ST in the last ST. CH 1 and turn. (35 STS)
Rows 3–4: * HDC BLO in each of the next 5 STS, SL ST BLO in each of the next 5 STS; repeat from * across until 5 STS remain. HDC BLO in each of the next 4 STS, then HDC in the last ST. CH 1 and turn. (35 STS)
Rows 5–6: * SL ST BLO in each of the next 5 STS, HDC BLO in each of the next 5 STS; repeat from * across until 5 STS remain. SL ST BLO in each of the next 4 STS, then SL ST in the last ST. CH 1 and turn. (35 STS)
Rows 7–260: Repeat Rows 3–6 or continue until the scarf reaches your desired length. Fasten off and weave in the ends.
Step 2 – Add the Fringe
- Wrap the yarn around an 8½”-wide piece of cardboard 32 times. Cut through the strands along one edge of the cardboard. You will make 5 fringe bundles evenly across each short edge of the scarf.
- For each edge, use 4 strands for each of the 3 center bundles and 2 strands for each outer bundle. Fold the strands in half. Insert a crochet hook through the edge of the scarf and pull the folded loop through. Pull the yarn ends through the loop and tighten gently. Repeat until all 5 fringe bundles are attached. Refer to the picture for placement.
- Knot the Fringe: Take all 4 ends from the first fringe bundle and 4 ends from the second bundle. Tie them together in an overhand knot. Take the remaining 4 ends from the second bundle and 4 ends from the third bundle. Tie them together. Continue in this manner across the edge. Repeat on the opposite edge of the scarf. Trim the fringe evenly. Weave in all loose ends and attach a tag, if desired.
- Watch here how to make a fringe.
I offer full support to help you with any questions or challenges you might have. Feel free to drop your comments in the section below or join our Facebook group, where I, along with my wonderful testers and community members, will be more than happy to assist you!