Free crochet wine bottle holder. Beginner-friendly one-row repeat stitch, charming flower design, and quick to finish. Perfect handmade gift!
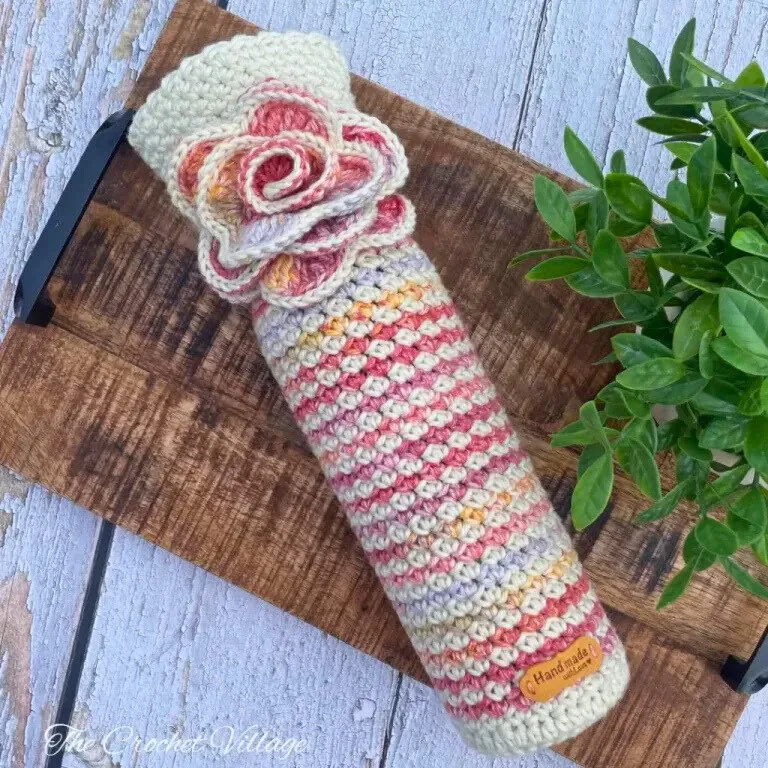
Looking to make your wine gifting extra special this holiday season? This free crochet wine bottle holder pattern has you covered!
With the holidays approaching and you wanting to give something thoughtful and personal, a bottle of wine is always nice — but wrapped in a lovely, handmade crochet wine cozy? That’s truly thoughtful.
This easy one-row repeat crochet pattern is beginner-friendly, works up fast, and looks gorgeous with a charming crochet flower on top. For best results, use a variegated yarn paired with a matching solid color — it creates a beautiful texture that looks stunning and unique.
You can use any worsted-weight yarn to make this wine bottle carrier — acrylic, cotton blend, any leftover you have on hand — but cotton yarn gives the best results. The stitches look crisp, the texture feels amazing, and your finished wine cozy will have that handmade quality that makes it extra special.
So grab your hook, pick your yarn, and let’s make something your friends are going to love!
Keep reading to find the free pattern, or if you prefer a printable add-free PDF, you can find it on Etsy, Ravelry, and my online store!
Free Crochet Wine Bottle Holder Pattern: Start Here
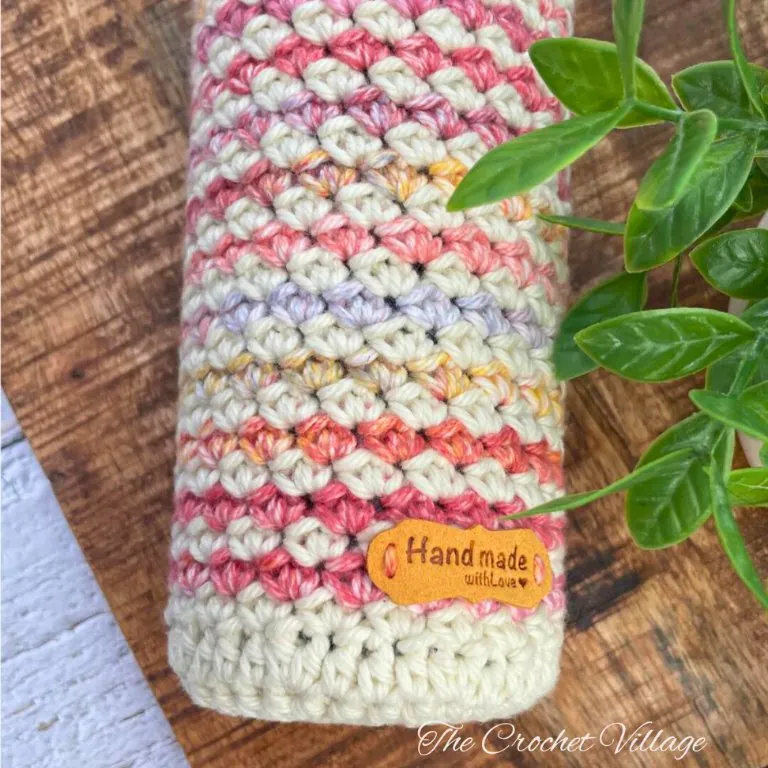
Recommended yarn:🧶 I Love This Cotton Yarn, #4 worsted-weight cotton yarn. Colors shown:
- Ivory: Color A
- Harvest: Color B
Note: Cotton yarn gives the best results, but cotton blends or acrylic yarns work too. Choose one variegated and one matching solid color yarn.
Yarn Substitution
- Caron All Day Cotton
- Paint Box Cotton Aran Yarn
- Lion Brand Local Grown Cotton Yarn
- Caron Cotton Cakes Yarn
Yardage: About 200 yds
Crochet hook: (G) 4 mm
Other materials
- Tag: Faux leather tag
- Tapestry needle: to weave in ends
Gauge: 4” square =18 rows and 16 SC
Abbreviations:
- CH: Chain
- ST: Stitch
- SLST: Slip stitch
- SC: Single crochet
- HDC: Half double crochet
- DC: Double crochet
- TR: Treble crochet
- RSC: Reverse single crochet
- YO: Yarn over
- Rep: Repeat
Measurements: H= 13”/ W= 5” (when laid flat)
Pattern notes
- This pattern is written in US terms.
- Skill level is easy.
- Joining the rounds: To avoid the seam, I crochet this wine tote in continuous rounds. You may use a stitch marker to mark the start of the rounds and move it up as you go. Feel free to join the round with a SL ST and CH1 if you prefer.
- Changing color: When switching to color B, YO, insert your hook into the last stitch of color A and pull up a loop with color A, YO with color B, and complete the stitch by pulling through all loops with color B. Drop color A and continue crocheting with color B. Change colors in the last ST of every row.
Special Stitches
Reverse single crochet or Crab stitch:* Insert the hook to the right into the next ST, then YO and draw the loop back to the front, YO again, and draw that loop through the two loops already on the hook,* rep *to* around, join with a SL ST, fasten off. Watch here.
Aria Wine Bottle Cover Crochet Pattern
Prefer A Printable PDF?
Treat yourself to the ad-free, beautifully formatted version of this design for a small fee!
Step 1 – Crochet the base
** A full photo tutorial is available in the premium version only**
With yarn A, , make a magic ring, CH1,
Rnd 1: 8 HDC in the circle, join with a SL ST into the 1st ST, CH1. (8)
Rnd 2: 2 HDC in each ST around, join with a SL ST into the 1st HDC, CH1. (16)
Rnd 3: * 2 HDC in next ST, HDC in next ST,* rep *to* around, join with SL ST into the 1st HDC, CH1. (24)
Rnd 4: * 2HDC in next ST, HDC in next 2 ST,* rep *to* around, join with a SL ST into the 1st HDC, CH1. (32)
Rnd 5: * 2 HDC in next ST, HDC in next 3 ST,* rep *to* around, join with a SL ST into the 1st HDC, CH 1. (40).
Close the magic ring by pulling the tail tight. Secure it with a couple of knots, then weave in the ends.
Step 2 – Crochet the body
Rnd 6: * 2 SC in next ST, skip next ST,* rep *to* around, change to yarn B in the last ST of the round, drop yarn A, and crochet continuously next round. You should have 20 (2 SC) groups.
Rnd 7: 2 SC in the 1st SC,*skip next ST, 2 SC groups in next ST,* rep *to*around, change to yarn A in the last ST, drop yarn B, crochet continuously next round. 20 (2 SC) groups.
Rnd 8 – Rnd 45: Rep Rnd 7, changing colors at the end of every round. At the end of Rnd 45, change to yarn A, cut yarn B.
Rnd 46- 56: Rep Rnd 7 with yarn A. Crochet the edging next.
Rnd 57 (edging): *RSC in next ST, skip next ST,* rep *to* around, join with a SL ST into the 1st RSC. Fasten off, cut yarn, and weave in ends.
Step 3 – Crochet the flower
With yarn B, CH 81 to make a foundation chain.
Row 1: SC in the 2nd chain from the hook, SC in the next 80 ST, turn.
Row 2: SC in 1st SC, *CH 5, Skip next 4 ST, SC in next ST,* rep *to*, turn.
Row 3: *(SC, HDC, DC, 3 TR) in next CH-5 sp, 1TR in 2nd ST of the 4 skipped STs of Row 1, (3 TR, DC, HDC, SC) in same CH-5 sp,* rep * to * across. Fasten off and leave a long tail for sewing.
Row 4: With yarn A, slip knot, then SL ST in the 1st ST of Row 3, SL ST in each ST across. Fasten off. Cut your yarn and weave in ends, but leave the long tail for sewing.
Step 4 – Assemble the flower
Roll the long crochet piece to form a flower, using the picture below as a guide. Adjust the petals until you’re happy with their shape.
Turn the flower upside down. If needed, use pins to hold the layers in place. Thread a tapestry needle with the long tail and sew the layers together all the way around. Trim any excess yarn and weave in the loose ends.
With yarn A, chain 100 to make a string. Secure both ends with a couple of knots, then cut the yarn. Using yarn A and a tapestry needle, attach the string to the middle back of the flower as shown in the picture. To close the wine tote, wrap the string around the bottle neck with the flower positioned at the front. Tie a knot to secure it and tuck in any extra string.
Attach the tag, and you are all done!
I offer full support to help you with any questions or challenges you might have. Feel free to drop your comments in the section below or join our Facebook group, where I, along with my wonderful testers and community members, will be more than happy to assist you!