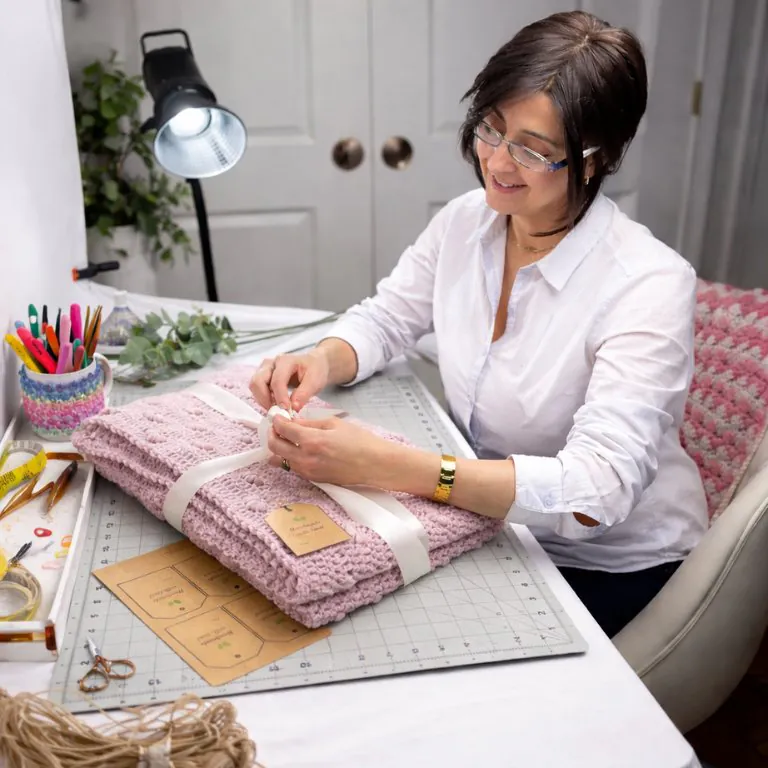
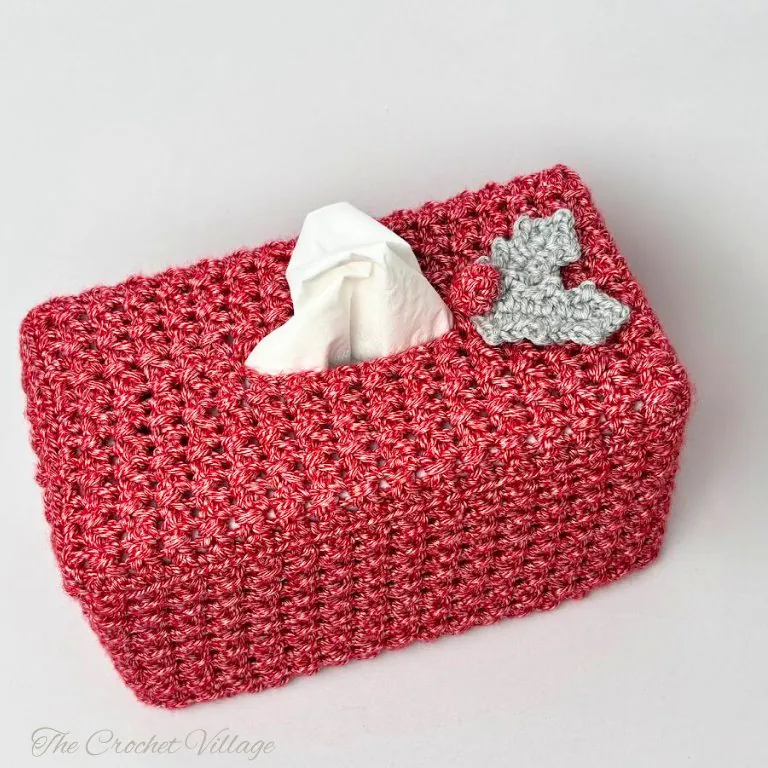
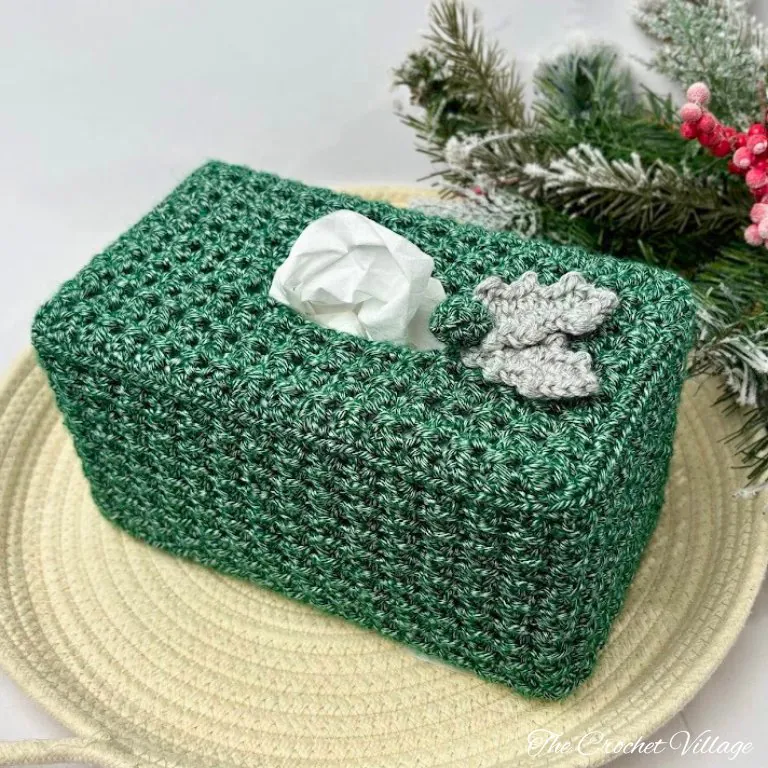
Every year, I love crocheting something new for Christmas. Sometimes it’s holiday décor, sometimes it’s a little handmade gift for friends and family. This year, I made the Merry Tissue Box Holder in several colors to dress up my tissue boxes in a festive holder that blends perfectly into my home décor.
It’s fun and quick to make, super practical, and looks adorable on the coffee table, a shelf, or anywhere that needs a little festive touch.

The Merry Crochet Christmas Tissue Box Cover pattern is an easy-to-intermediate skill level, and the final box holder fits the standard rectangular tissue box (around 9″ x 4.5″ x 4.5″). It looks great as is, but I topped it with an adorable holly leaf and berry accent for extra holiday charm.
I used a simple one-row repeat stitch that creates beautiful texture—one of those stitches I keep coming back to in different projects like my Buttercup Soap Bag and Wash Cloth, Harmony Scarf & Hat set… I just love it! 🙂
The construction of the box holder is simple. You crochet the top section in rows to create the tissue opening, then work in the round to build the sides.
Ready to crochet your own Merry Tissue Box Holder? Let’s dive into the free pattern below!

Related: Free Crochet Christmas Patterns
Free Crochet Christmas Tissue Box Cover Pattern – Start Here
Recommended Yarn: 🧶 Loops & Threads Heathered Bamboo Yarn. #4 worsted-weight yarn. Colors shown:
Yarn Substitution
- Mary Maxim Starlette Sparkle Yarn
- Red Heart Roll with It Sparkle Yarn
- Silky Soft Yarn by Loops & Threads
- Caron Simply Soft Yarn
Yardage: About 150 yds
Crochet Hook: (H) 5 mm
Gauge: 4” square = 18 ST and 14 rows
Other Materials
- Stitch markers.
- Tapestry needle to weave in ends.
Abbreviations
- CH: Chain
- ST: Stitch
- SL ST: Slip stitch
- SC: Single crochet
- HDC: Half double crochet
- BLO: Back loop only
- RSC: Reverse single crochet
- YO: Yarn over
- Rnd: Round
- SP: Space
- Rep: Repeat
- WS: Wrong side
- RS: Right side
Finished Dimensions:
- About: 7 ½ “ in height and 11” in width when laid flat.
- Fits a standard rectangular tissue box (9” long, 4.5” wide, and 4.5” high).
Pattern notes
Terms of Use 🌺I’m so happy to share this free pattern with you! Please enjoy it here on the blog (copying and printing isn’t allowed). If you’d like an ad-free, printable PDF, you can grab it in my shop for a small fee. Sharing this post helps me keep creating more free patterns—your support means the world! ❤️
- The pattern is written in US terms
- Skill level: Easy to Intermediate
Special Stitches
- Reverse single crochet RSC: Insert your hook into the ST to the right of your current stitch.YO and pull up a loop (you now have 2 loops on your hook). YO again and pull through both loops. Repeat across the round.
- Crochet in rounds, join and turn: At the end of each round, join with a slip stitch to the first stitch of the round, CH 1, then turn your work and crochet the next round in the opposite direction. Watch here.

Crochet Tissue Box Cover: Merry Tissue Box Cover
In this free Christmas crochet blanket pattern, I’ll share all the materials you need and provide step-by-step instructions to make the Winterland Blanket in any size. If you prefer a printable, ad-free PDF, the premium version is available now for purchase in all my shops linked below.
Prefer a Printable PDF?
Love this pattern? Treat yourself to the ad-free, beautifully formatted version of this design for a small fee.
Step 1- Crochet the top of the box cover
Cut 100″ of the yarn (about 2¾ yards). Set it aside — it will be used to make Section B of the top. CH 34 to make a foundation chain.
Row 1 (RS):
- Make the 1st 2-SC cluster: Insert hook in the 2nd CH from the hook, pull up a loop, skip 1 CH, insert hook in next CH, pull up a loop, YO, pull through all 3 loops.
- Make next 2-SC clusters: *CH 1, insert hook in the last worked CH (from the previous cluster), pull up a loop, skip 1 CH, insert hook in next CH, pull up a loop, yarn over, pull through all 3 loops, * rep * to * across. You should have 16 (2-SC clusters), CH 1, 1 SC in the last chain (already holding the previous cluster), CH 1, turn.
Row 2 (WS):
1- Work 2-SC cluster over the next 2 CH-1 sp: Insert hook in the 1st CH-1 sp, pull up a loop, skip next ST, insert hook in the next CH-1 sp, pull up a loop, YO, pull through all 3 loops.
2- Next 2-SC clusters:*CH 1, insert hook in the last worked CH-1 sp, pull up a loop, insert hook in the next CH-1 sp, pull up a loop, YO, pull through all 3 loops,* rep* to * across until 2 ST remaining, CH 1, insert hook in the last worked CH-1 sp, pull up a loop, skip next ST, insert hook in the last ST, pull up a loop, YO, pull through all 3 loops. You should have 16 (2SC clusters), CH 1, 1 SC in the last ST (already holding the previous cluster), turn.
Note:
- In the entire pattern, you will work 2-SC clusters over each 2 CH-1 sp, as explained in Row 2.
- The next 2-SC clusters start where the previous cluster ends.
- Make sure you finish each row with: CH 1, SC in the last ST already holding the last cluster, then turn.
- When you turn, make sure you work in the very 1st CH-1 sp (you can easily miss it)
Rows 3 – 6: Rep Row 2. At the end of row 6, your work should measure about 8” wide and 2” high. If your work measures differently, start again with a different hook size.
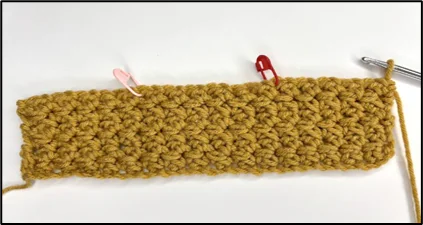
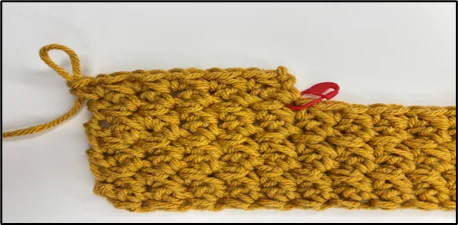
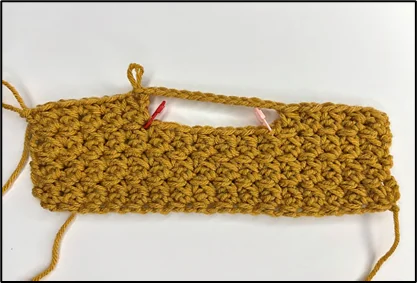
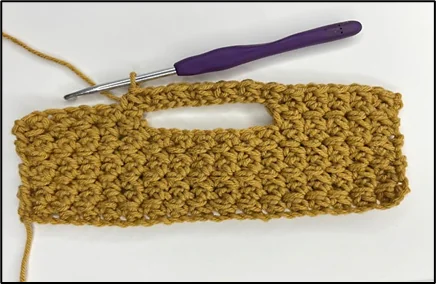
Step 2 – Create the cover’s top opening
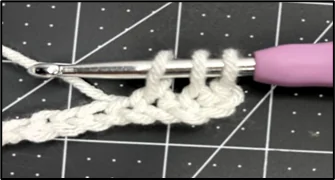
Lay your work on a flat surface and count 5 (2-SC clusters) from each end, then place a stitch marker in the next CH-1sp (refer to the picture below). This will divide your work into three sections:
- The right and left sections will be worked separately and joined later.
- The middle section remains unworked to create the opening for the cover.
Right section:
Row 7 (RS): Rep Row 2 ending in the marked sp. You should have 5 (2-SC clusters), CH 1, SC in the last CH-1 sp, turn.
Row 8 (WS): Rep Row 2 ending with CH1, SC in the last CH-1 sp, turn. 5 (2-SC clusters). Remove the hook from the loop; do not cut yarn. Crochet the left section.
Left section:
Row 7 (RS): With the RS facing, use the string of yarn you put aside. Slip knot, insert hook in the MS, pull up a loop, insert the hook into the next CH-1 sp, pull up a loop, YO, pull through all 3 loops, CH 1. Continue making 2-SC clusters over each CH-1 sp to the end, CH 1, SC in the last ST turn. 5 (2-SC clusters)
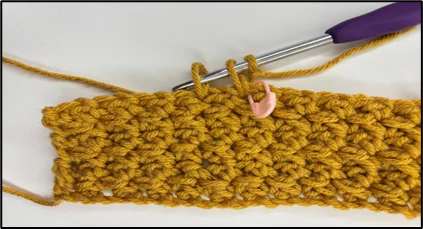
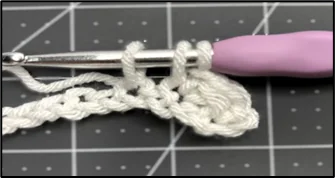
Row 8 (WS): Rep Row 2 until 2 ST remaining (slip knot count as a ST), CH 1, insert hook in the last worked CH-1 sp, pull up a loop, insert hook in the last ST, pull up a loop, YO, pull through all 3 loops. You should have 5 (2-SC clusters). DO NOT CH 1 and SC in the last ST as usual. CH 12, SL ST into the corner of the right section. Fasten off, cut the extra yarn, and leave some to weave in. Turn your work, RS facing, place your hook in the loose loop.
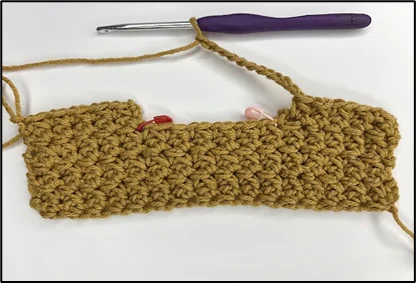
Row 9 (RS):
- Rep Row 2 until you have 5 x 2-SC clusters.
- CH1, insert hook in last CH-1 sp, pull up a loop, skip next CH (SL ST doesn’t count as a ST), insert hook in next CH, pull up a loop, YO, pull through all loops, *CH 1, insert hook in the last worked CH, pull up a loop, skip 1 CH, insert hook in next CH, pull up a loop, yarn over, pull through all 3 loops, * rep * to * across 6 (2-SC clusters).
- CH 1, insert hook in the last worked CH, pull up a loop, insert hook in next CH-1 sp, pull up a loop, yarn over, pull through all 3 loops, CH 1. Continue making 2-SC cluster over each CH-1 sp across ending with CH 1, SC in the last CH-1 sp, turn. 5 (2-SC clusters).
- You should have a total of 16 (2-SC clusters).
Row 10-14: Rep row 2. AT the end of the last 14, turn. Next, you will crochet the sides of the box cover. Your crochet should measure about: 7 ¾” x 4 ¾”.
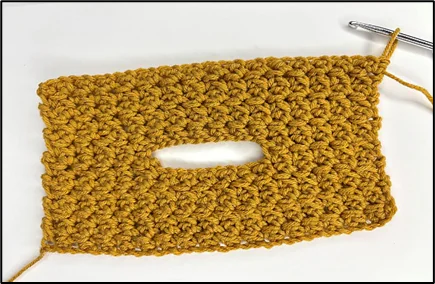
Step 3 – Crochet the sides of the cover
The pattern now changes to rounds and resets to make it easier to count rounds from the top.
Rnd 1 (RS): *SC in each ST and CH sp to end, do not turn, continue crocheting loosely along the side, making 1 SC in each row,* rep *to* around, join with a SL ST into the 1st ST, CH 1, do not turn. You should have 94 ST.
Rnd 2 (RS): SC BLO in each ST around, join with a SL ST into the 1st ST, do not turn. 94 ST. Your crochet should measure about: 8 ½” x 5 ½”.
Rnd 3 (RS): CH 1, insert hook in the same ST as CH 1, pull up a loop, skip 1 ST, insert hook in next ST, pull up a loop, YO, pull through all 3 loops,* CH 1, insert hook in the last worked ST, pull up a loop, skip 1 ST, insert hook in next ST, pull up a loop, YO, pull through all 3 loops, * rep * to * around. You should have 47 (2-SC clusters), CH 1, join with an SL ST into the 1st ST, turn.
Rnd 4 (WS): *CH 1, 2SC-cluster over the next 2 CH-1 sp,* rep around. 47 (2-SC clusters), CH 1, join with an SL ST into the 1st ST, turn.
Rnd 5-18: Rep Rnd 4, turning your work at the end of each round. At the end of Rnd 18, do not turn.
Rnd 19 (RS): SL ST BLO in each ST and CH around, join with a SL ST in 1st ST. Fasten off. Weave in all ends.
Step 4 – Crochet the holly leaf (make 2)
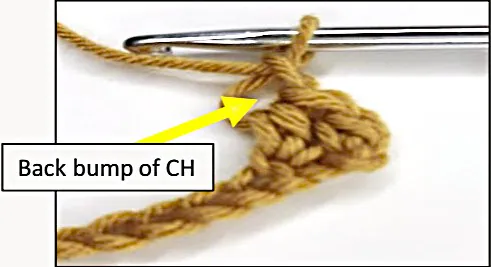
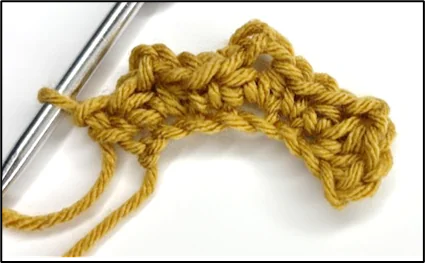
Row 1 (side 1): With yarn B, CH 8. SC in 2nd CH from hook, (HDC, CH 1 (loosely), SL ST into the back bump of the CH you just made, HDC) in next CH, *SC in next CH, (HDC, CH 1, SL ST into the back bump of the CH you just made, HDC) in next CH,* rep *to* until 1 CH remaining, (SC, CH 1, SL ST in the back bump of the CH you just made, SC) in last CH. Continue crocheting along the other side of the foundation chain.
Note:
- You will crochet a SC in the next CH, then (HDC, CH 1, SL ST, HDC) all in the next CH.
- If you find it difficult to SL ST into the back bump of the CH 1, you may instead CH 2 and SL ST into the 2nd CH from the hook.
Row 1 (side 2): *(HDC, CH 1, SL ST into the back bump of the CH you just made, HDC) in the next CH, SC in the next CH,* rep *to* across, ending with a SC in the last CH, join with SL ST into the 1st SC. Fasten off and leave a long tail for sewing on one leaf only. For the other leaf, cut the yarn and weave in the ends.
Step 5 – Crochet the berry
With yarn A, make a magic circle.
Rnd 1: Work 6 sc into the magic circle. Do not join; continue crocheting in rounds. Place a stitch marker in the 1st ST and move it up as you go.
Rnd 2-3: SC in each ST around. At the end of Rnd 3, fasten off and leave a long tail for sewing. Tuck the starting yarn into the center. Using a yarn needle and the long tail, sew across the top of the berry to close it.
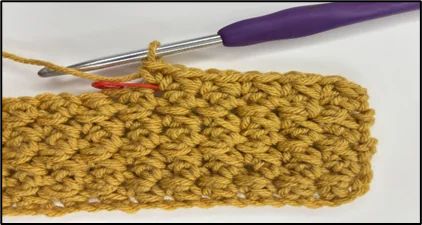
Step 6: Finish
Sew the two leaves to the top of the cover using a few stitches for placement (see photo). Cut and weave in the ends. Then, sew the berry to the leaves using the berry’s long tail.
Cut your yarn, weave in all remaining ends, and you are all done!