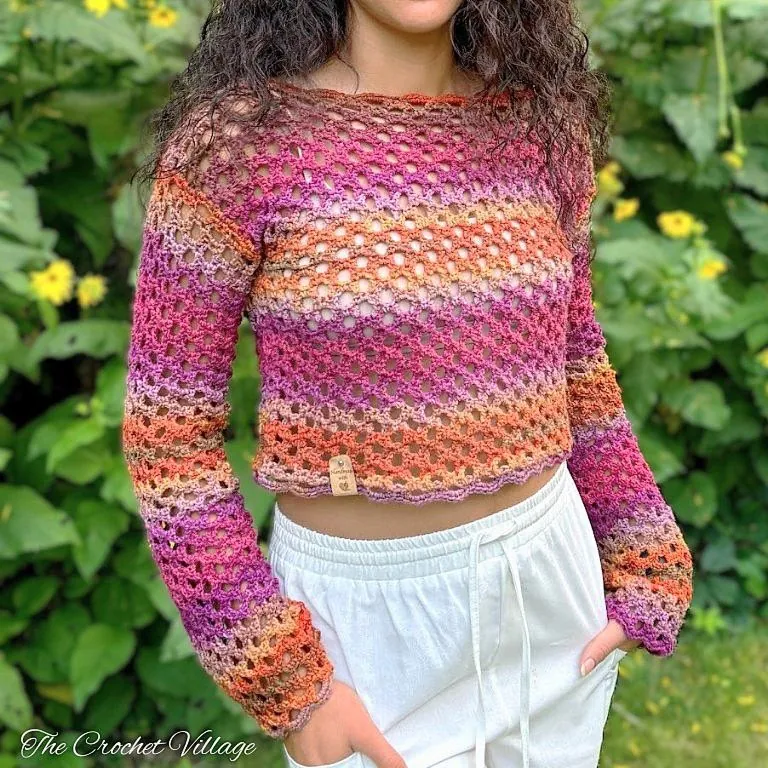
Create a stylish and lightweight crochet mesh sweater with the free Scarlet Sweater pattern. This easy, breathable crochet long sleeve top features a simple 2-row repeat, minimal shaping, and a flattering drape. Perfect as a summer crochet sweater, beach cover-up, or customizable crochet top, this pattern is written for sizes XS–5XL and is ideal for warm-weather layering.
If you’re looking for a lightweight crochet sweater that’s easy to wear and fun to make, you’re going to love the Scarlet Sweater.
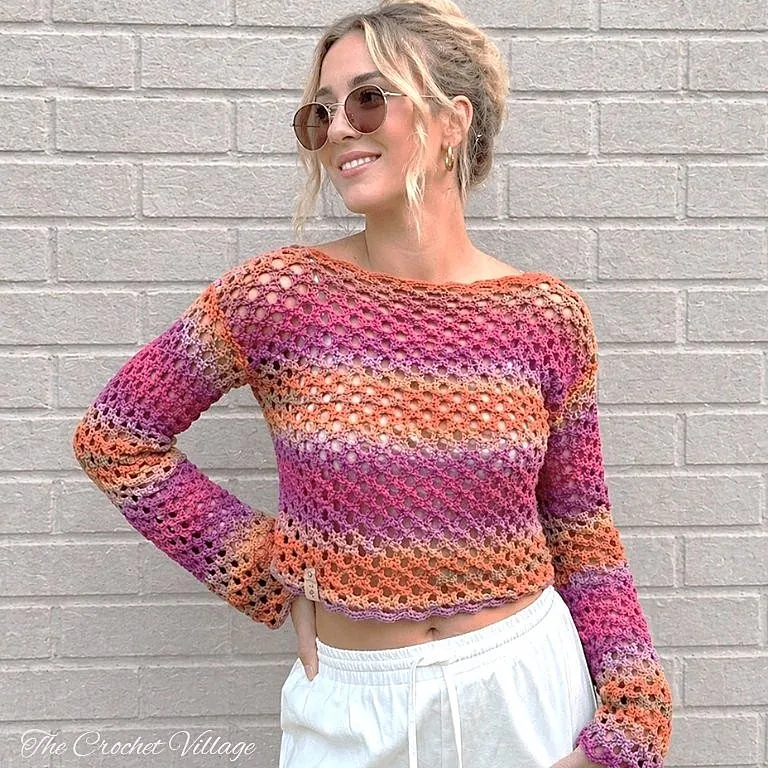
This free crochet mesh sweater pattern is simple, airy, and perfect for warm weather. It’s the kind of piece you can throw on over shorts, a skirt, or even a swimsuit—and it still looks put together.
The stitch creates a soft, open mesh that drapes beautifully without feeling too loose. It’s breathable, comfortable, and just right for summer days or cooler evenings.

Why You’ll Love This Free Crochet Mesh Pattern
This pattern is all about relaxed crochet with a stylish result.
The stitch is a simple 2-row repeat, so once you get going, it becomes very easy to remember. It creates a light mesh with just enough structure to drape nicely without feeling too loose.
It’s also super versatile. You can make it into a cropped top, a full-length sweater, a beach cover-up, or even a dress by adding more length.
The construction is beginner-friendly, too. You’ll make two panels from the bottom up, then work the sleeves directly onto the panels in rows with no increases. The sleeves naturally form a soft bell shape, which gives it a really flattering look.
This pattern is written for sizes XS to 5XL and is best for intermediate crocheters, but confident beginners can definitely give it a try.

Best Yarn for a Crochet Mesh Sweater (Scarlet Sweater)
Choosing the right yarn is honestly one of my favorite parts of making this crochet mesh sweater. It really changes the whole look of your finished piece.
For the Scarlet Sweater, I recommend using #3 (DK weight) yarn to keep that light, breathable feel that makes this top perfect for warm weather.
I used Premier Color Fusion DK Yarn for my version, and I absolutely love how it turned out. The colors blend so smoothly with soft transitions, giving the sweater an effortless, stylish look without any extra work.
If you prefer a softer vibe, pastel shades look beautiful with this mesh stitch. And if you want something a little more elevated, darker colors like black or navy give it a really elegant finish (just a bit harder to see your stitches while working).
You can really have fun with this part—solid, variegated, light, or bold… it all works with this design.
And if you need a little inspiration, take a look at the tester photos on Ravelry. They came out so beautiful, and it’s always fun to see how different yarn choices completely change the look of the same pattern.

Free Crochet Mesh Stitch Summer Top Pattern: Start Here
Recommended Yarn: 🧶 Premier Color Fusion DK Yarn, #3 lightweight yarn. Color shown: Autumn Sky.
Yarn Substitution: These yarns are a close match, but you should always swatch.
- Baby Cuddles™ Yarn by Loops & Threads
- Lion Brand Yarn CobooYarn
- Premier Yarns Anti-Pilling DK Colors
Yardage: Depends on the size you are making; see the sizing chart.
Crochet Hooks: (H) 5 mm or the needed hook to meet the gauge.
Gauge: 22 sts x 10 rows = 4½” x 4”
Other Materials
- Tag: Faux leather tags
- Stitch markers.
- Measuring tape.
- Tapestry needle.
- Scissors.
Abbreviations
- CH: Chain
- ST: Stitch
- SL ST: Slip stitch
- SC: Single crochet
- DC: Double crochet
- SP: Space
- YO: Yarn over
- Rep: Repeat
Pattern Notes
- This pattern is written in US terms.
- Skill level is intermediate.
- This sweater is crocheted from the bottom up in separate panels and sewn together at the end.
- The stitch count and number of rows for each size can be found in parentheses in the corresponding color: XS (S, M, L, XL, 2XL, 3XL, 4XL, 5XL). Note: the color-coded sizes are available in the premium version only.
- The numbers at the beginning of the rows are your row count for all sizes.
- The numbers at the end of the rows are your stitch counts for all sizes.
Step 1- Swatch your gauge
If you’re new to gauge swatching, click here for more details.
- To check gauge, chain 22 using a 5 mm hook and follow the pattern for 10 rows. Your swatch should measure 4½” wide by 4” high.
- If your swatch does not match, adjust your hook size and try again until it does. If the width is correct but the height is slightly off, I recommend using the hook size that gives you the correct width.
- The premium version of the pattern includes a step-by-step swatch tutorial with progress photos to help you check your gauge with confidence.
Step 2 – Find your size
- The model has a 34” bust, is 5.8” tall, and is wearing a size small.
- The fit of the sweater varies depending on the size. See Garment Ease.
- The sweater has a 0”- 2” positive ease.
- For the best fit, I recommend using your bust measurement, then selecting the closest size to your size from the table below. Pay attention to the positive/negative ease and finished measurements for the size you choose so you can get an idea of how the sweater will fit you.
Click here for the sizing chart
| Size | Bust Size | Panel Width | Panel Length | Finished Measurement | Positive/ Negative ease | Yardage |
| XS | 28”- 30” | 15” | 15” | 30” | 2”_ 0” | 2 skeins/ 625 yards |
| S | 32”- 34” | 17” | 17” | 34” | 2”_ 0” | 3 skeins/ 761 yards |
| M | 36”- 38” | 19” | 19” | 38” | 2”_ 0” | 3 skeins/ 892 yards |
| L | 40”- 42” | 21” | 21” | 42” | 2”_ 0” | 4 skeins/ 1060 yards |
| XL | 44”- 46” | 23” | 23” | 46” | 2”_ 0” | 4 skeins/ 1230 yards |
| 2XL | 48”- 50” | 25” | 25” | 50” | 2”_ 0” | 5 skeins/ 1570 yards |
| 3XL | 52”- 54” | 27” | 27” | 54” | 2” _ 0” | 5 skeins/ 1600 yards |
| 4XL | 56”- 58” | 29” | 29” | 58” | 2” _ 0” | 6 skeins/ 1780 yards |
| 5XL | 60”- 62” | 31” | 31” | 62” | 2”_ 0” | 7 skeins/ 1987 yards |
Scarlet Mesh Top Crochet Pattern
In this free crochet summer crop top pattern, I’ll walk you through all the materials you need, along with step-by-step instructions to make this gorgeous mesh top from start to finish.
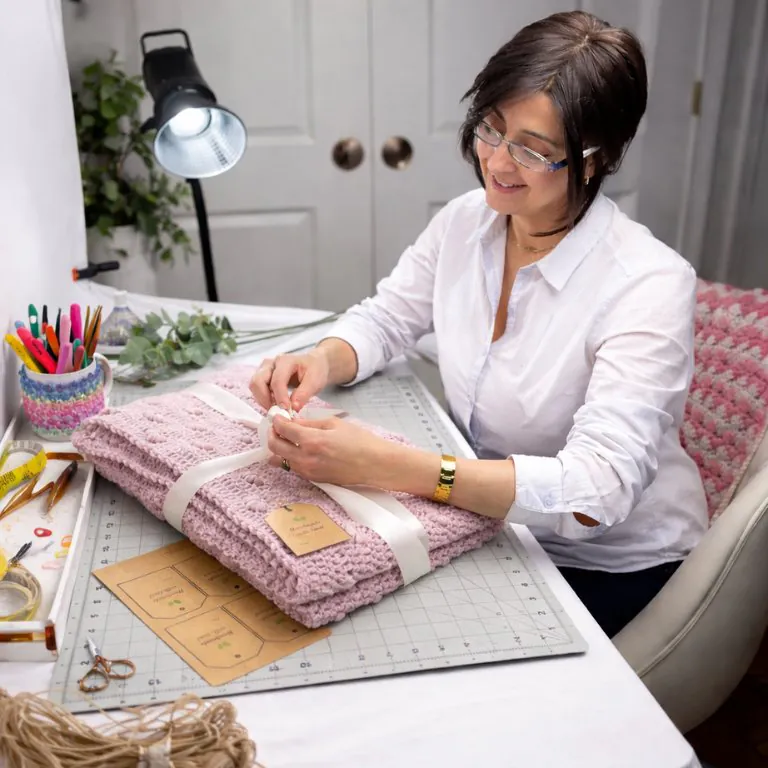
Prefer a printable, ad-free PDF? The premium version of the Scarlet Sweater crochet pattern includes color-coded sizes and progress photos — all beautifully laid out for easy reference. Available for a small fee in my online shops linked below.
Prefer A Printable PDF?
Treat yourself to the ad-free, beautifully formatted version of this design for a small fee!
Step 3 – Crochet the panels (make 2)
CH 76(82, 94, 100, 112, 124, 130, 142, 148) to make a foundation chain.
Row 1: (RS) SC in 2nd CH from the hook, SC in next 2 CH, *CH 3, skip next 3 CH, SC in next 3 CH*, rep *to* across, ending with SC in last 3 CH, turn. 12 (13, 15, 16, 18, 20, 21, 23, 24) CH-3 sp.
Row 2: (WS) CH 4,*skip next ST, DC in next ST, SC in next CH-3 sp, DC in next ST, CH 3*, rep *to* across, ending with DC in next ST, CH 3, DC in last ST, turn. 13(14, 16, 17, 19, 21,22,24, 25) CH-3 sp (starting CH sp counts as CH-3 sp)
Row 3: (RS) CH 4,*SC in next CH-3 sp, DC in next ST, CH 3, skip next ST, DC in next ST*, rep *to* across, ending with DC in next ST, SC in last CH-4 sp, DC in 3rd CH of the starting CH 4, turn. 12(13,15, 16, 18, 20, 21,23, 24) CH-3 sp (starting CH sp counts as CH-3 sp)
Row 4: (WS) CH 4,*skip next ST, DC in next ST, SC in next CH-3 sp, DC in next ST, CH 3*, rep *to* across, ending with DC in next ST, CH 3, DC in the 3rd CH of the starting CH 4, turn. 13 (14, 16, 17, 19, 21,22, 24, 25) CH-3 sp (starting CH sp is counts as a CH-3 sp)
Row 5 to Row 32(36,42, 46, 52, 56, 62, 66, 72) or to the desired length: Rep Row 3-4 ending with Row 4. Do not cut yarn; proceed to shape the neckline.
Step 4 – Shape the neckline (same for both panels)
In this step, you will divide the last row of the panel into three sections: one for the head opening in the middle, and two for the shoulders on the sides.
- From the outside working towards the center, count 4(4, 5, 5, 6, 7, 8, 8, 8) CH-3 sp and place a stitch marker in the next DC.
- Repeat this on the other side. You should have 5 (6, 6, 7, 7, 7, 6, 8, 9) CH-3 sp in between the stitch markers. Crochet the shoulders next.
Shoulder 1
Row33(37,43, 47,53, 57, 63, 67, 73): (WS) With the yarn still on the hook, CH 4, *SC in next CH-3 sp, DC in next ST, CH 3, skip next ST, DC in next ST*, rep *to* across, ending with DC in next ST, SC in last CH-3 SP, DC in marked ST, turn.
Row 34(38,44, 48, 54, 58, 64, 68, 74): (RS) CH 4,*skip next ST, DC in next ST, SC in next CH-3 sp, DC in next ST, CH 3*, rep *to* across, ending with DC in next ST, CH 3, DC in the 3rd CH of the starting CH 4, turn.
Row 35 (39, 45, 49, 55, 59, 65, 69, 75): (WS) CH 4,*SC in next CH-3 sp, DC in next ST, CH 3, skip next ST, DC in next ST*, rep *to* across, ending with DC in next ST, SC in last CH-4 SP, DC in the 3rd CH of the starting CH 4, turn.
Row 36 (40,46, 50, 56, 60, 66, 70, 76): CH 4,*skip next ST, DC in next ST, SC in next CH-3 sp, DC in next ST, CH 3*, rep *to* across, ending with DC in next ST, CH 3, DC in the 3rd CH of the starting CH 4. Fasten off and leave a 12” long tail for sewing. Note: You only need to leave a long tail for sewing on one of the panels.
Shoulder 2:
Row 33 (37, 43, 47, 53, 57, 63, 67, 73): (WS) Slip knot, DC in the marked ST, *SC in next CH-3 sp, DC in next ST, CH 3, skip next ST, DC in next ST*, rep *to* across, ending with DC in next ST, SC in last CH-4 SP, DC in 3rd CH of the starting CH 4, turn.
Row 34(38, 44, 48, 54, 58, 64, 68, 74):(RS)CH 4,*skip next ST, DC in next ST, SC in next CH-3 sp, DC in next ST, CH 3*, rep *to* across, ending with DC in next ST, CH 3, DC in last ST, turn.
Row 35(39, 45, 49, 55,59, 65, 69, 75): WS) CH4,*SC in next CH-3 sp, DC in next ST, CH 3, skip next ST, DC in next ST*, rep *to* across, ending with DC in next ST, SC in last CH-4 SP, DC in 3rd CH of the starting CH 4, turn.
Row 36 (40, 46, 50, 56, 60, 66, 70, 76):(RS)CH 4,*skip next ST, DC in next ST, SC in next CH-3 sp, DC in next ST, CH 3*, rep *to* across, ending with DC in next ST, CH 3, DC in last ST, turn. Fasten off and leave a 12” long tail for sewing. Note: You only need to leave a long tail for sewing on one of the panels.
Step 5 – Join the shoulders
- Align the panels, the wrong sides facing.
- Use pins to attach the front panel’s shoulder sections to the back panel.
- Use the tapestry needle and the long tails to sew the shoulders (only), making sure you grab one stitch from the one panel and the opposite stitch from the opposite panel. Feel free to join the shoulders with SL ST.
- Fasten off. Weave in ends.
Step 6 – Prepare to crochet the sleeves
- The sleeves are crocheted in rows from the top of the arm to the cuff and are attached directly to the body of the sweater.
- Lay the body of the sweater flat with the right side facing up. On the front panel, count 9 (10, 11, 12, 13, 13, 14, 15, 16) CH-4 sp from the shoulder seam and place a stitch marker in the next row. Repeat this for the back panel, referring to the picture below.
- You should have a total of 18 ( 20, 22, 24, 26, 26, 28, 30, 32) CH-4 sp between the stitch markers.
- The distance between these markers is the width of the sleeve.
- To customize the width of the sleeve, measure around the widest section of the upper arm located above the elbow. Add 2“ to 4” ease or adjust to your liking. Make sure your first row is a multiple of 6+4. Then follow the stitch pattern and crochet to the desired length, ending with Row 3.
- Repeat the same steps on the opposite edge for the 2nd sleeve.
Step 7 – Crochet the sleeves (make 2)
Row 1: This is the foundation row. Keep your tension a little loose. With (RS) facing you, make a slip knot, then 2 SC in the first marked row, *2 SC in next CH sp, SC in next row*, rep *to* across until you reach the seam, 2 SC in the seam, *2 SC in next CH sp, SC in next row*, rep *to* across until you reach the second marked stitch, 2 SC in the marked stitch, turn. 58(64, 70, 76,82, 82, 88, 94, 100) stitches.
Row 2: (WS) CH 1, SC in same ST, SC in next 2 ST, *CH 3, skip next 3 ST, SC in next 3 ST*, rep *to* across, turn.
Row 3: (RS) CH 4,*skip next ST, DC in next ST, SC in next CH-3 sp, DC in next ST, CH 3*, rep *to* across, ending with DC in next ST, CH 3, DC in last ST, turn.
Row 4: (WS) CH 4, *SC in next CH-3 sp, DC in next ST, CH 3, skip next ST, DC in next ST*, rep *to* across, ending with DC in next ST, SC in last CH-4 SP, DC in 3rd CH of the starting CH 4, turn.
Row 5 to Row 46(48, 48, 52, 52, 54, 54, 56, 56) or to the desired length: Rep Row 3-4 ending with Row 4.
Note: The sleeves are designed to be longer than usual, but feel free to adjust the length to your liking.
Last Row: CH1, SC in same ST, SC in next ST,*5 SC in next CH-3 sp, skip next ST, SC in next ST, skip next ST*, rep *to* across, ending with 5 SC in last CH-3 sp, skip next ST, SC in next ST, SC in last CH 4 sp. Cut your yarn and leave a long tail for sewing.
Step 8 – Sew the sleeves and panels
- With the wrong side facing, fold the sleeve lengthwise.
- Ensure the panels are aligned and use pins to attach them if needed.
- Sew the long ends of the sleeve one stitch at a time, using a tapestry needle and the long tail.
- Once you reach the end of the sleeve, sew the sides of the panels together, referring to the picture below.
- Feel free to use slip stitches to join the sleeve and panels. Fasten off.
Step 9 – Finish the sweater
Crochet the sweater’s bottom edging: With the right side facing, slip knot, SC in seam to your right, CH 1, SC in same ST, SC in next ST,*5 SC in next CH-3 sp, skip next ST, SC in next ST, skip next ST*, rep *to* across until you reach the opposite seam, SC in the seam, SC in next ST,*5 SC in next CH-3 sp, skip next ST, SC in next ST, skip next ST*, rep *to* across ending with 5 SC in last CH-3 sp, skip next ST, SC in next ST, join with a SL ST into the 1st SC. Fasten off.
Crochet the neck edging
With the right side facing, slip knot, SC in the shoulder seam to your right, [5 SC in next CH-sp, SC in next CH-sp, 5 SC in next row (see picture 1), *SC in next SC (see picture 3), skip next ST, 5 SC in next CH-sp, skip next ST*, rep *to* 6 times, SC next ST, 5 SC in next row, SC in next CH sp, 5 SC in next CH-sp, SC in the seam]. Rep [to] one more time, join with a SL ST into the 1st SC. Fasten off.
Weave in all ends, attach a tag, and you are all done!