Looking for a fun and easy crochet project that you can use all year round? You’re going to love this free crochet wreath pattern! It’s beginner-friendly, quick to work up, and perfect for every season. Whether you’re making cozy fall crochet décor, a festive Christmas wreath, a spooky Halloween piece, or a bright and cheerful Easter decoration, this simple crochet pattern can be customized to fit any holiday or occasion.

What makes this DIY crochet wreath so special is its simplicity and versatility. All you need is a foam ring (you can grab one at any craft store) and some yarn to create a tube-like crochet cover that slips right over the form. From there, you can add your own seasonal touches with flowers, greenery, or holiday picks—and you’ve got a stunning handmade wreath that’s completely one-of-a-kind.
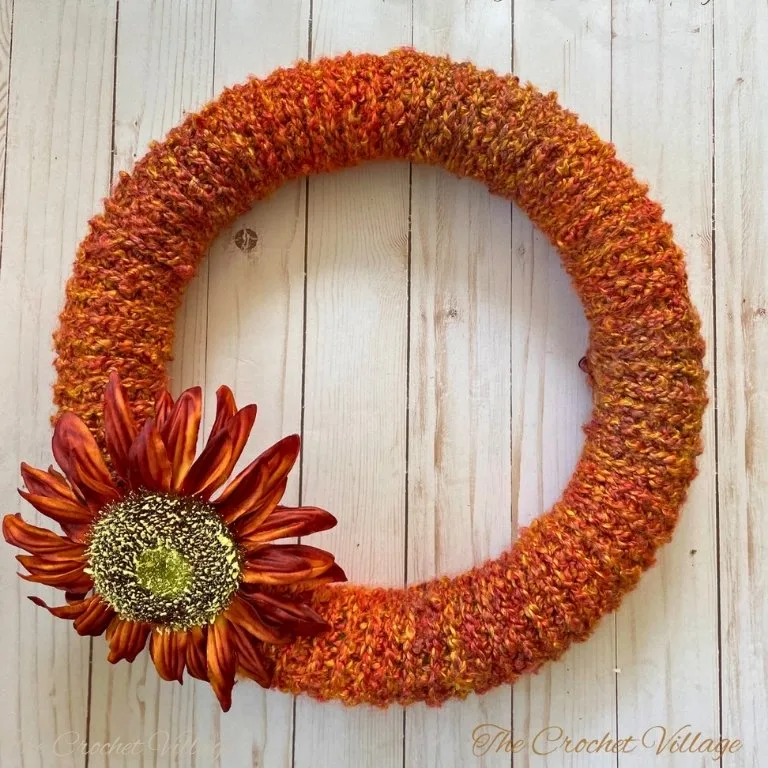
For my Woodland Wreath, I chose a bulky yarn in dreamy autumn shades of orange, red, and gold, and it worked up super quickly! I absolutely love how warm and inviting it looks hanging on my door.
In this post, I’ll show you exactly how to make a similar wreath for cozy fall décor, but the fun part is—you can use this same pattern for Christmas, spring, or even summer. Just swap out the yarn colors and seasonal picks, and you’ve got a handmade wreath perfect for any time of year!
Before we start this Free and easy Crochet Wreath Pattern
Free and Easy Crochet Fall Wreath Pattern: Start Here
Recommended Yarn: 🧶 Hobby Lobby Yarn Bee Fireside, #5 Bulky weight yarn. Color shown: Mandarin
Yardage: About 141 yd (1skein).
Yarn Substitution
Crochet Hook: (H) 5mm
Other Materials
- 1.9 “ x 13.8” Foam Wreath
- Fall mixed bush
- Glue: Super glue or glue gun
- Tapestry needle: to weave in ends.
Gauge: 4” square =10 rows and 12 pattern Stitches
Finished Dimensions: 14” in diameter
Abbreviations
- CH: Chain
- ST: Stitch
- SLST: Slip stitch
- SC: Single crochet
- HDC: Half double crochet
- YO: yarn over
- SM: Stitch marker
- Rnd: Round
- Rep: Repeat
Special Stitches
Half double crochet in the 3rd loop: Like other stitches, the half double stitch has two loops at the top. But if you take a closer look, there’s a hidden loop behind these two, named the “third loop.” To work into it, simply turn your work slightly and insert your hook under this loop. For a visual demonstration, watch the video linked here.
Pattern notes
- This pattern is written in US terms.
- The skill level is easy.
- You will crochet a sleeve in continuous rounds using only HDC in the 3rd loop.
Pro Tips
It might be a little tricky to see the stitches at the beginning when working with certain yarns, but don’t worry—it gets much easier after a few rounds. Here are some tips:
- Make your foundation chain a little loose.
- View stitches from above to find the 3rd loop.
- Use your fingers to feel the next stitch.
- Use a stitch marker to mark the beginning of each round.
- Regularly count your stitches to avoid missing any.
Woodland Crochet Wreath Pattern
This free crochet fall wreath pattern has everything you need to make your own Woodland Wreath. In this post, you’ll find the complete materials list and detailed step-by-step instructions to guide you through every stitch.
If you’d prefer a printable, ad-free PDF, you can grab a copy for a small fee in any of my shops—links are below.
Prefer A Printable PDF?
Treat yourself to the ad-free, beautifully formatted version of this design for a small fee!
Step 1 – Crochet the sleeve
Chain 18 CH to make a foundation chain (keep your tension a little loose here), SL ST into the 1st CH to make a circle.
Note: Crochet continuously all rounds. Use a SM and move it up each round.
Rnd 1: SC in each ST around. (18 ST)
Rnd 2: HDC in each ST around. (18 ST)
Rnd 3 -79: HDC in the 3rd loop in each ST around. (18 ST)
Rnd 80: HDC in each ST around, ending with a SL ST into last ST. Cut the yarn and leave a 12” long tail for sewing.
Step 2 – Assemble the wreath
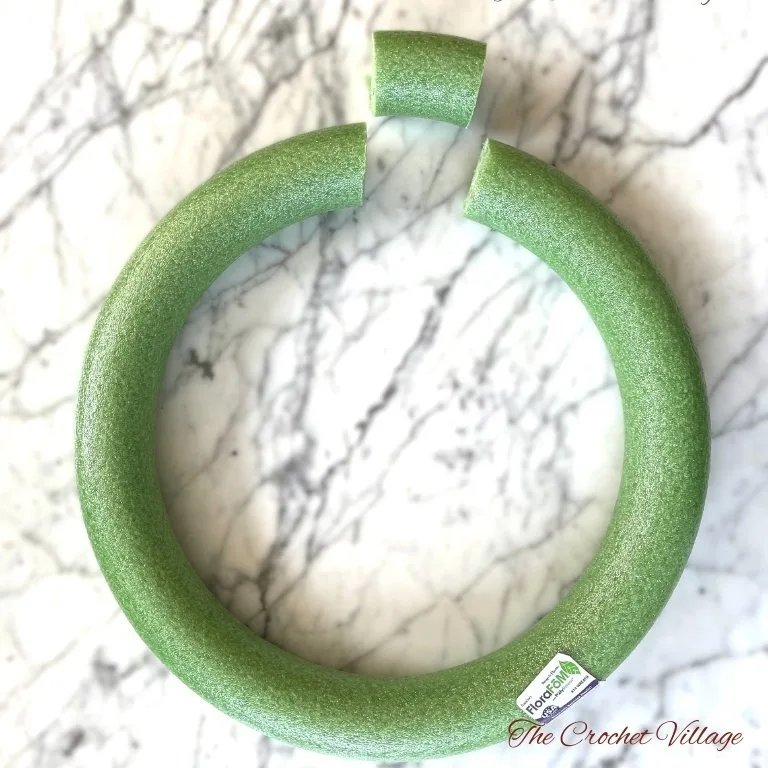
- Cut a 2-inch section from the foam wreath using a bread knife or similar, referring to the picture below.
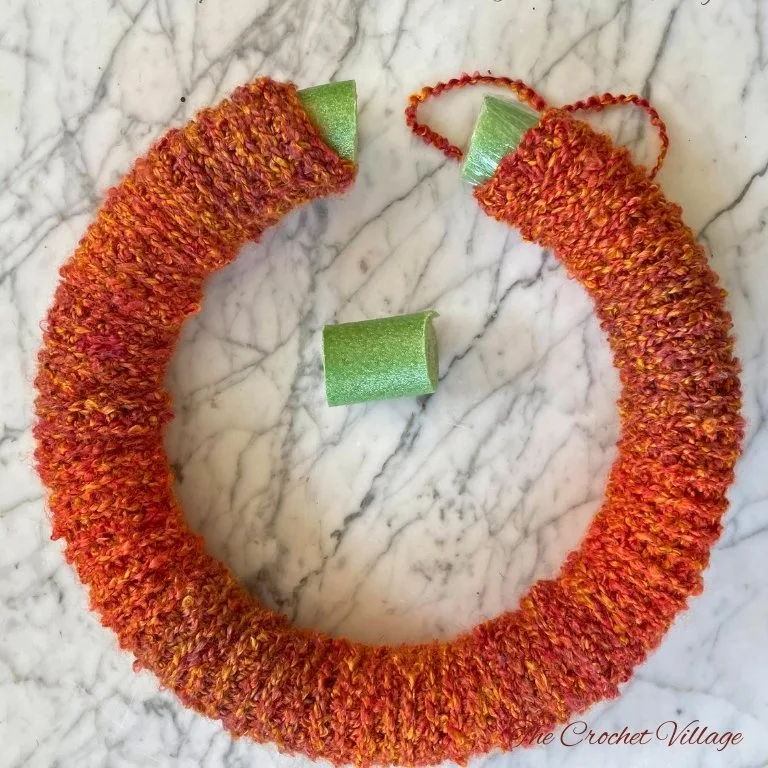
- Slide the foam wreath into the sleeve.
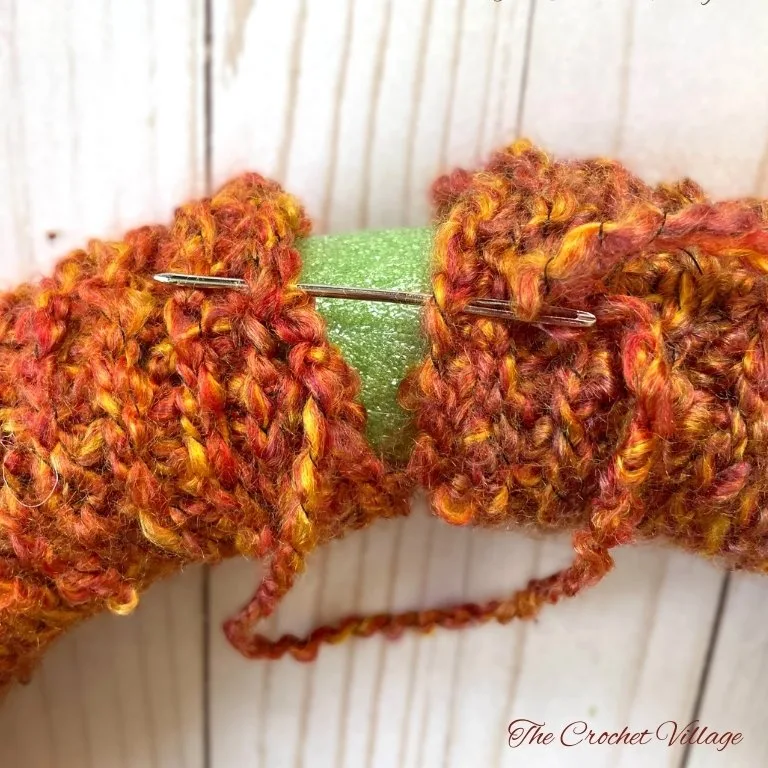
- Glue the 2-inch section back into place and allow the glue to dry.
- Use a tapestry needle and the long tail of yarn to sew the ends of the sleeve together all the way around.
- Fasten off and weave in ends.
Step 3 – Decorate the wreath
- Detach the fall bush components (flowers, leaves, etc.), leaving about a 3-inch-long stem on each piece.
- Use scissors to remove the plastic covering from the stems to expose the wire.
- Insert and arrange the floral stems into the wreath to your satisfaction: Start by placing the larger elements first, then arrange the smaller elements around them. Use pins if needed to secure the components in place.
- Once you’re pleased with the arrangement, apply a few drops of glue to the leaves and any elements that might shift.
Step 4 – Crochet a hanging loop
Slip knot, SL ST into the middle top back of the wreath, CH 12, SL ST into the same ST to form a loop, SL ST into each CH of the loop, SL ST into the 1st ST, fasten off, weaving ends, and you are all done!
I offer full support to help you with any questions or challenges you might have. Feel free to drop your comments in the section below or join our Facebook group, where I, along with my wonderful testers and community members, will be more than happy to assist you!