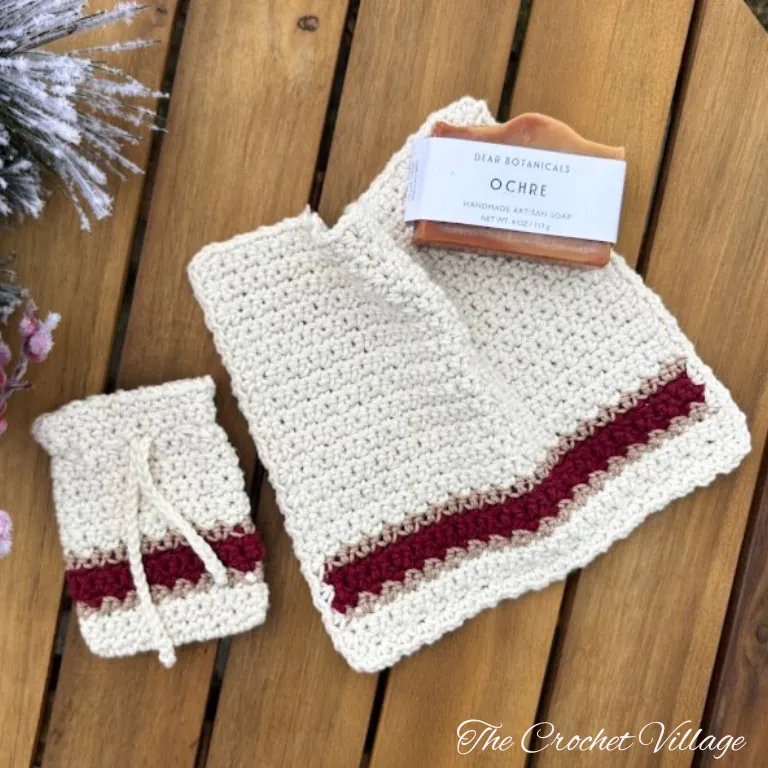
Quick and easy free crochet spa set pattern featuring a festive washcloth and matching soap saver—perfect for last-minute Christmas gifting and beyond!

Looking for a quick, delightful, and budget-friendly handmade gift this holiday season? You’ll love the Merry Spa Set—a free crochet bath set pattern that’s perfect for Christmas gifting!
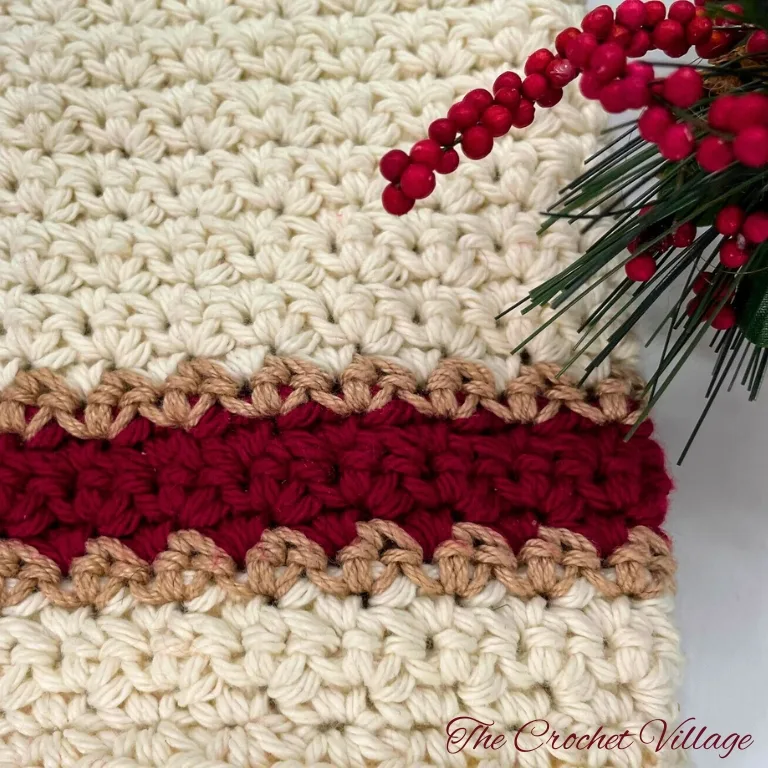
I designed this festive 2-in-1 bundle to include a soft, textured washcloth and a matching soap saver, using worsted-weight cotton yarn in classic Christmas colors: beige, red, and gold-brown to add just the right touch of holiday charm. But it looks fantastic in any color or theme—perfect for using up leftover yarn!
Merry bath Set works up quickly, looks beautiful, and when paired with a handmade soap, becomes a lovely handmade gift for under $10—ideal for teachers, neighbors, or stocking stuffers.
In this post, I’ll guide you through crocheting this beautiful spa set so you can add a touch of eco-friendly charm and handmade love to your Christmas gift-giving.
Keep reading to find the free pattern, or if you prefer a printable add-free PDF, you can find it on Etsy, Ravelry, and my online store!
Related: How to photograph crochet items | Free Crochet Patterns For Christmas Gifts and Decorations.
Before we start this free Crochet Spa Set Pattern
Free Crochet Christmas Bath Set Pattern- Start Here

Recommended yarn:
- Crafter’s Secret Cotton Yarn, #4 worsted-weight cotton yarn. Colors shown:
- Ivory: Yarn A.
- Bordeaux: Yarn C
- Yarn Bee Fundamental Cotton Yarn, Color shown: Camel: Yarn B. You can use Lion Brand 24/7 Cotton yarn instead, or any cotton yarn in a brown-gold shade.
- I Love This Cotton Yarn
- Paint Box Aran Cotton yarn
- Premier Yarns Home Cotton Yarn
- Yarnart Jeans Yarn
- Lily Sugar ‘n Cream Yarn
Yardage: About 130 yds
Crochet hook: 5 mm
Other Materials: Tapestry needle: to weave in ends.
Gauge: 4” square = 16 rows and 18 SC
Abbreviations
- CH: Chain
- ST: Stitch
- SL ST: Slip stitch
- SC: Single crochet
- Rep: Repeat
- RS: Right side
- WS: Wrong side
Measurements:
- Washcloth: 9”x 9”
- Soap saver: 4”x 5”
Pattern notes
- This pattern is written in US terms.
- The pattern is easy for a confident beginner.
- Includes instructions for: a washcloth and a soap bag.
- The soap bag is crocheted in the round, but you change direction after joining each round. (See details below.) Pay attention when “Turn” your work is required.
- To change colors, simply CH 1 with the new color.
How to crochet in rounds, join, and turn (soap bag)
At the end of each round, join with a slip stitch to the first stitch of the round, CH 1, then turn your work and crochet the next round in the opposite direction. Watch here.
Merry Spa Set Free Crochet Pattern For Christmas Gifts
In this free crochet spa set pattern, I’ll guide you step-by-step to create a lovely reusable crochet spa set, including a washcloth, a soap saver, and face scrubbies.
If you prefer an ad-free PDF that you can easily print and save, a premium version is also available for a small fee in all my shops linked below.
Prefer A Printable PDF?
Treat yourself to the ad-free, beautifully formatted version of this design for a small fee!
Step 1- Crochet the washcloth
With yarn A, CH 34 (or a multiple of 2) to make a foundation chain.
Row 1: SC in 2nd CH from the hook, *2 SC in the next CH, skip next CH,* rep *to* across until one CH remaining, SC in last CH, CH 1, turn. 16 (2 SC groups).
Row 2: (Yarn A) SC in 1st ST, *skip next ST, 2 SC in next ST,* rep *to* across until one ST remaining, SC in last ST, CH 1, turn.
Row 3 – 4: (Yarn A) Rep Row 2. At the end of Row 4, CH 1 with yarn B, drop yarn A, turn.
Row 5: (Yarn B), rep Row 2, CH 1 with yarn C, drop yarn B, turn.
Row 6 – 8: (Yarn C), rep Row 2. At the end of Row 8, CH 1 with yarn B, cut yarn C (weave in ends), turn.
Row 9: (Yarn B), rep Row 2, CH 1 with yarn A, cut yarn B (weave in ends), turn.
Row 10 – 35: (Yarn A), rep Row 2. At the end of Row 35, (SC, CH1, SC) in the last ST (corner). Do not cut yarn A; proceed to crochet the edging.
Crochet the border
- Crochet down the side edge: *Skip the next row, (SC, CH 1, SC) in the next row,* repeat from * to * until you reach the corner. (SC, CH 1, SC) in the corner.
- Crochet along the foundation edge (bottom): *(SC, CH 1, SC) in the next stitch, skip the next stitch,* repeat from * to * until you reach the corner. (SC, CH 1, SC) in the corner.
- Crochet up the opposite side: Repeat Step (1).
- Crochet along the top edge: Repeat Step (2), then join with a SL ST into the first SC of the (SC, CH 1, SC) corner.
- Fasten off and weave in ends.
How the soap saver bag is constructed
The soap bag is crocheted in rounds, but you will change direction after joining each round, working back and forth from the starting stitch.
- At the end of each round, turn your work—you’ll crochet one round on the right side, then the next on the wrong side.
- Use a stitch marker to keep track of the beginning of each round.
- Change color at the end of the round by CH 1 with the new color
Step 2 – Crochet the soap bag
With yarn A, CH 15 (loosely) to make a foundation chain,
Rnd 1: 2 SC in the 2nd CH from the hook, SC in the next 12 ST, 3 SC in the last CH. Continue crocheting along the unused back loops of the foundation chain. SC in next 12 ST (crochet over the tail to hide it), SC in the last CH already holding 2 SC, join with a SL ST in the 1st SC (use a ST marker here), CH1.
Rnd 2: (RS) (yarn A), *2 SC in the next ST, skip next ST,* rep * to * around, join with a SL ST into the 1st SC, CH1, turn. [15 (2-sc groups), stays the same through the pattern]
Rnd 3: (WS) (yarn A), *skip next ST, 2 SC in next ST,* rep * to *around, join with a SL ST into the 1st SC, CH1, turn.
Rnd 4: (RS) (yarn A), rep Rnd 3, CH1 with yarn B, drop yarn A, turn.
Rnd 5: (WS) (yarn B), rep Rnd 3, CH1 with yarn C, drop yarn B, turn.
Rnd 6-8: (yarn C), rep Rnd 3, turning your work at the end of the round. At the end of Rnd 8, CH1 with yarn B, cut yarn C, turn.
Rnd 9: (WS) (yarn B), rep Rnd 3, CH1 with yarn A, cut yarn B, turn.
Rnd 10-20: (Yarn A), rep Rnd 3, turning your work at the end of each round. At the end of the last round, CH1, do not turn; crochet the border next.
Rnd 21: (Yarn A) *skip next ST,(SC, CH1, SC) in next ST,* rep * to * around, join with a SL ST in the 1st SC. Fasten off. Cut yarn and weave in all ends.
Make the drawstring
With yarn A, CH 60 to make a drawstring, fasten off, then cut the yarn, then weave in ends. Thread the drawstring through Round 18, going over and under each 2-sc group as you go.
You are all done!
I offer full support to help you with any questions or challenges you might have. Feel free to drop your comments in the section below or join our Facebook group, where I, along with my wonderful testers and community members, will be more than happy to assist you!