
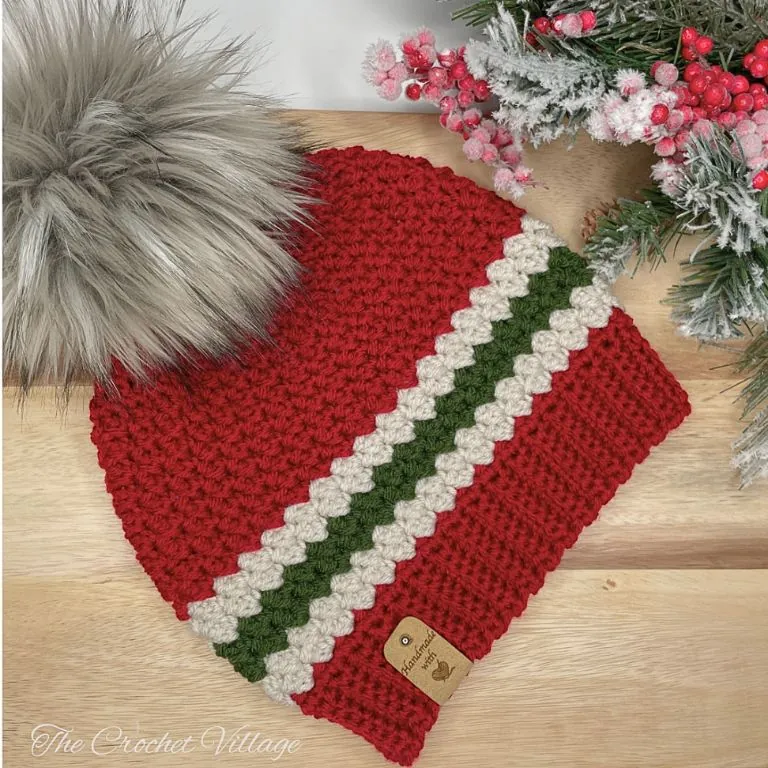
If you’ve been looking for a free crochet Christmas hat pattern that makes a great family holiday set — warm, comfy, cute, festive but not too Christmassy — the Winter Sled Beanie is it. I’ve lost count of how many I’ve made at this point, and I still come back to it every December.
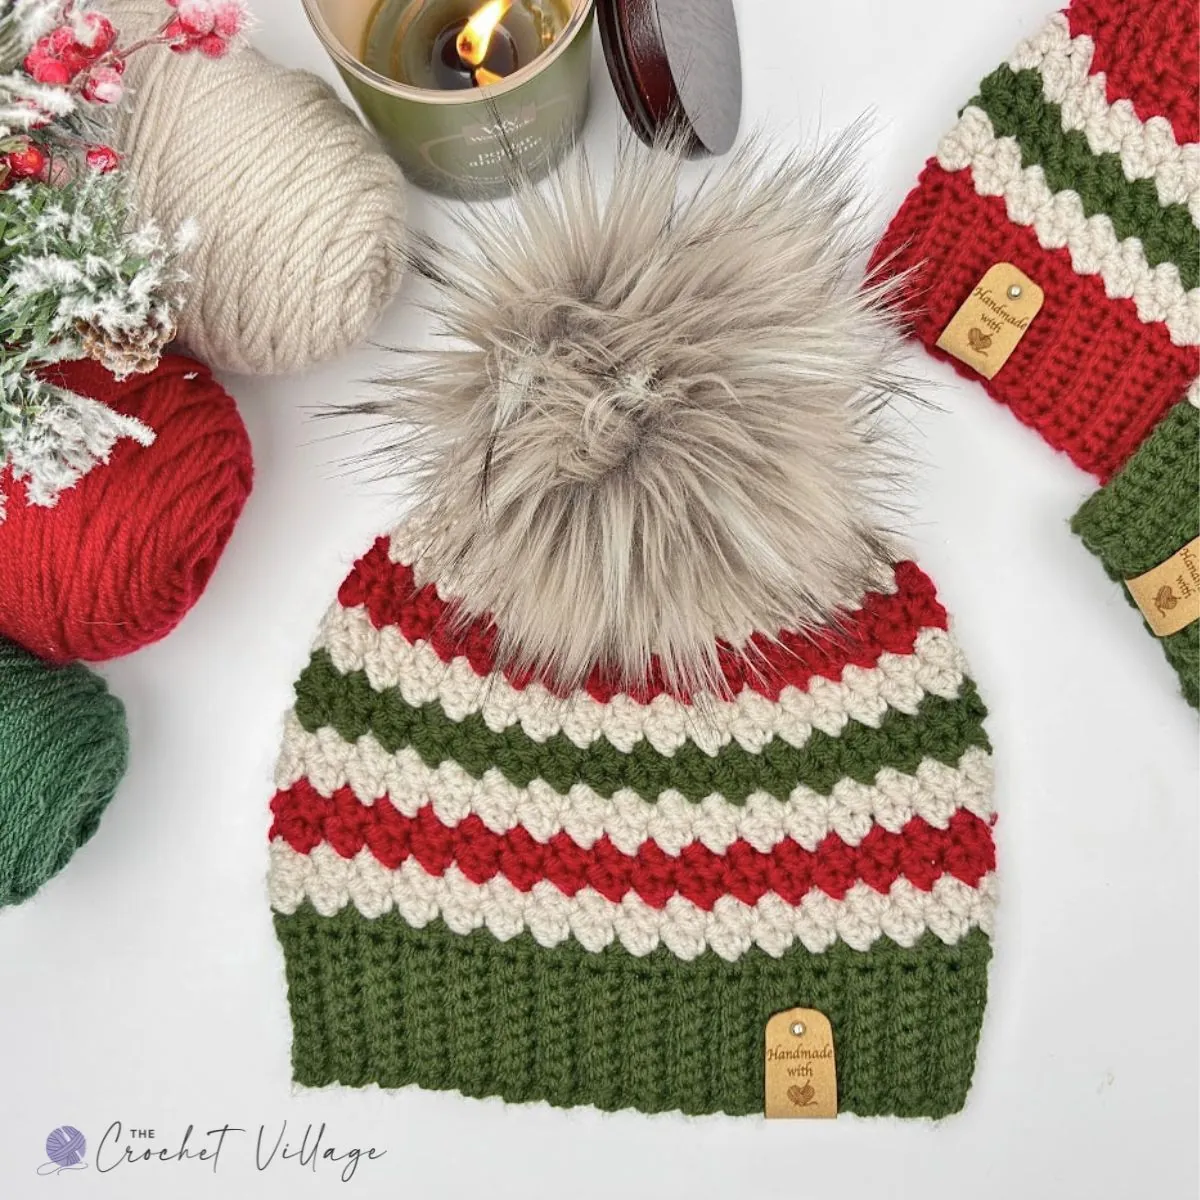
The hat is worked bottom up. You start with a ribbed brim for stretch, then work the body in rounds using a beautiful textured stitch that’s just a one-row repeat. It’s an easy rhythm to fall into, and the fabric comes out thick and squishy.
The color combinations are pretty much endless, which is half the fun. Mix and match whatever you have and you can put together a whole set for the family — one stripe or several, wide bands or skinny ones. Change the color sequence and it’s a completely different hat.
I used I Love This Yarn from Hobby Lobby — it’s soft and the color options are great. Red, green, and beige felt classic, and my family wore theirs all winter, not just at Christmas. Any #4 medium weight yarn will work!
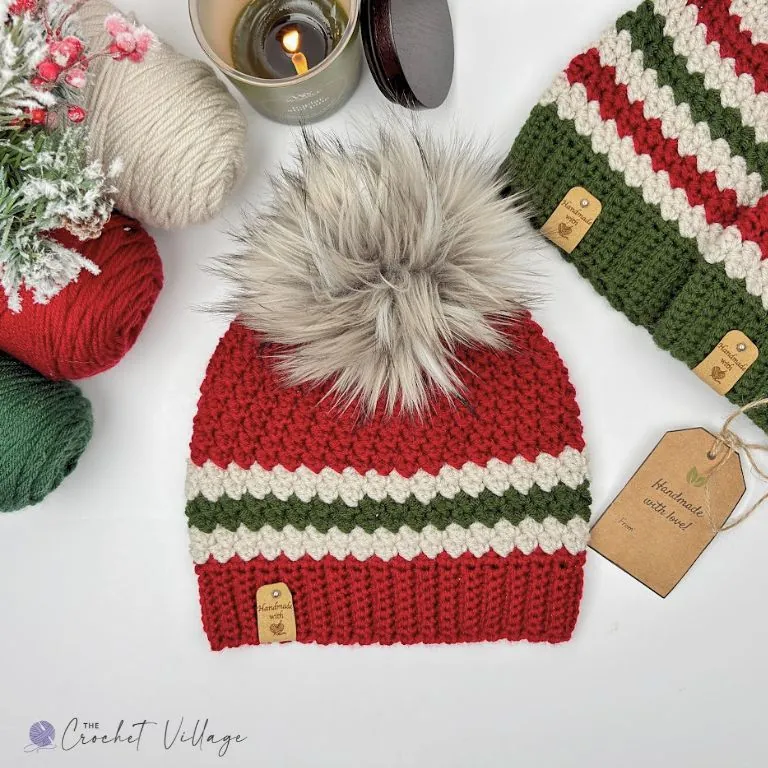
No Endless Ends to Weave In
You might be looking at all those stripes and thinking, that’s a lot of ends. Good news — it isn’t. Instead of cutting your yarn at every color change, you carry the non-working color up the inside of the hat and crochet over it in the first stitch of each round. That little bit of enclosing keeps it tacked to the fabric until you need it again. I love this technique. No ends to weave in at the finish, and the inside of the hat stays neat.
The other thing worth mentioning: color changes worked in the round usually leave a visible seam, with a little jog where the rounds don’t quite line up. In this pattern, the transitions come out surprisingly smooth. There’s still a seam — there always is — but it’s barely noticeable, especially once the hat is on.
About the sizes: the full pattern covers three sizes — child, teen/small adult, and large adult — plus customization tips so you can adjust it to fit any head. The free version below is the teen/small adult size. If you’d like all three sizes in a printable, ad-free PDF, it’s available in my online shops for a small fee.
Prefer A Printable PDF?
Treat yourself to the ad-free, beautifully formatted version of this design for a small fee!
Why You’ll Love This Free Crochet Christmas Hat Pattern
- It’s cute. Looks just as lovely on a little one as it does on an adult.
- It’s quick. Most people finish one in an evening — perfect for a last-minute present.
- It’s easy. A simple one-row repeat, so you can crochet it while watching a movie.
- The color combos are endless. Stripe it, block it, or leave it plain — it looks great either way.
- It’s a scrap buster. Stripes are a great way to use up partial skeins.
- It fits well. Designed to be comfy across all sizes, with a ribbed brim that has real stretch.
- You can make it your own. Solid, striped, pom or no pom — three color combos are included to get you started.
- It’s not just for Christmas. These get worn all winter long, not just on Christmas morning.
Pom Pom or No Pom Pom?
Totally up to you. A big faux fur pom gives the hat that cozy, store-bought look, and it’s what I go with most of the time. But the textured stripes carry the hat on their own, so a pom-free version looks just as finished — and it’s a bit easier to toss in the wash.
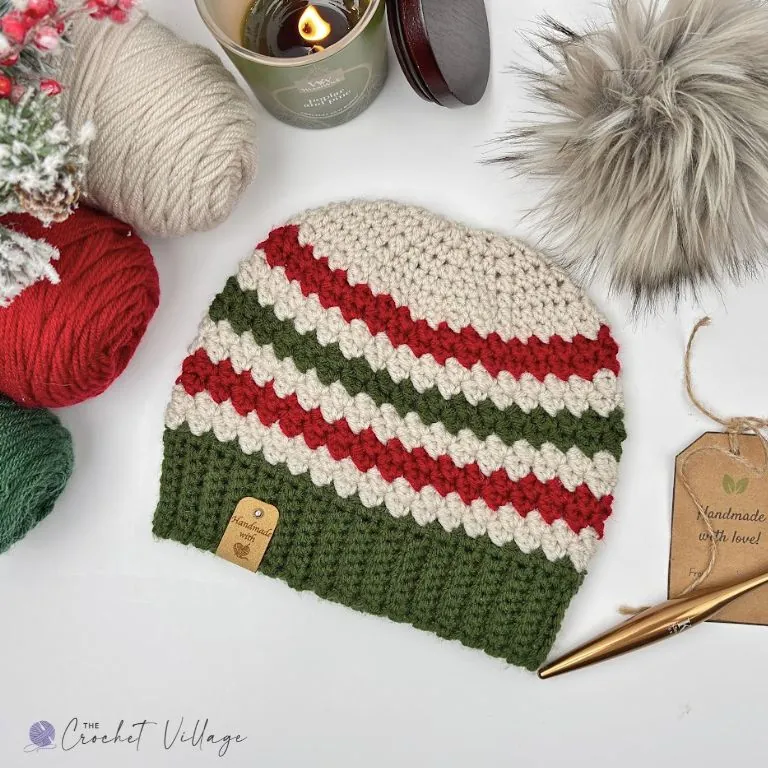
If you do add one, I’d suggest sewing on a snap instead of attaching the pom permanently. That way you can pop it off before washing, or swap poms between hats.
Related: Winter Collection | Free Crochet Patterns For Christmas Gifts and Decorations | Free Crochet Winter Accessories
Keep reading to find the free pattern, or if you prefer a printable add-free PDF, you can find it on Etsy, Ravelry, and my online store!
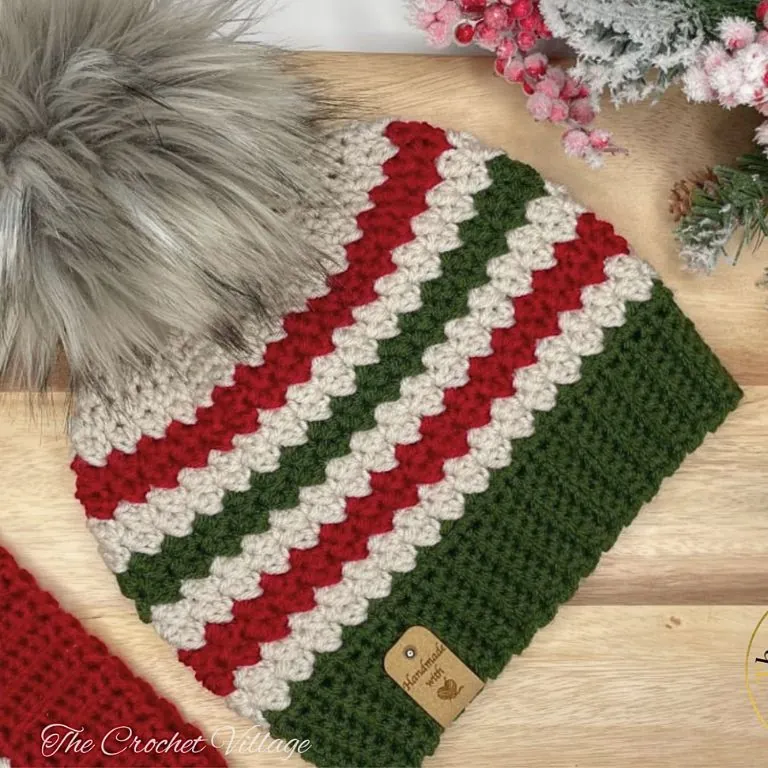
Free Crochet Christmas Hat Pattern – Start Here
Recommended yarn: Any #4 worsted-weight yarn works. I used Love This Yarn. Colors shown:
- Linen: Yarn A
- Cranberry: Yarn B
- Dark Olive: Yarn C
Yardage: Teen/ Adult Small: About 162 yd
Crochet hooks
- (H) 5mm for the body
- 4.5mm for the brim
Gauge
- Brim: 2” square / 4.5 mm hook = 10 SC BLO, and 10 rows
- Body: 4” square / 5 mm hook = 10 rows and 14 ST (Pattern stitches)
Yarn substitution
Other materials
- Pom-pom: 6”pom-pom
- Tag: Faux leather tags
- Tapestry needle
Pattern notes
- TERMINOLOGY: Written in US terms.
- DIFFICULTY: Easy to intermediate.
- CONSTRUCTION: This hat is crocheted from the bottom up. The brim is worked in rows, and the body is worked in joined rounds
Special stitches
- SC2TOG (Single Crochet 2 Together): Insert the hook into the next ST and pull up a loop. Insert the hook into the following ST and pull up a loop. YO and pull through all 3 loops on the hook.
- HDC2TOG (Half Double Crochet 2 Together): YO, insert the hook into the next ST, and pull up a loop. , Insert the hook into the following ST, and pull up a loop. YO and pull through all 4 loops on the hook
Abbreviations
- CH: Chain
- ST: Stitch
- STS: Stitches
- SL ST: Slip stitch
- SC: Single crochet
- HDC: Half double crochet
- DC: Double crochet
- SC2TOG: Single crochet 2 stitches together
- HDC2TOG: Half double crochet 2 stitches together
- YO: Yarn over
- RND: Round
- REP: Repeat
Construction: This hat is crocheted from the bottom up. The brim is worked in rows, and the body is worked in joined rounds.
Changing Colors: To change colors, join the round with a SL ST using the new yarn, then drop the old yarn. Do not cut the old yarn; you will carry it upward and use it again when needed.
Carrying the Yarn: Carry the non-working yarn up the inside of the stocking by crocheting over it in the first ST:
- Insert the hook into the first ST, passing under the non-working yarn.
- YO and complete the ST with the working yarn.
- Drop the non-working yarn until it is needed again.
Working in Rounds with Color Changes: When working in joined rounds with multiple colors, a seam will form at the back of the stocking. It will not be very noticeable. If you prefer smoother color changes, you may use an invisible SL ST instead of a standard SL ST to join each round.
Invisible Slip Stitch: At the end of the round, remove the hook from the working loop. Insert the hook from back to front through the first ST, then pull the working loop through to the inside of the stocking. CH 1 with the color used for the next round. Watch here to learn how to make an invisible SL ST.
Sizes and measurements
The free pattern below is written for the Teen / Adult Small size. The full pattern includes all three sizes: Child Teen/ Adult small, and Adult Medium & Large. Measurements are taken with the hat laid flat and unstretched.
- Child: fits head circumference 18″ – 20″ (about ages 3–10)
- Teen / Adult Small: fits head circumference 20″ – 22″ (about ages 11 and up)
- Adult Medium / Large: fits head circumference 22″ – 24“
- The numbers at the beginning of each row are the row numbers.
- The numbers at the end of each row are the stitch count for that row.
Step 1 — Crochet the Brim
Gauge: 10 SC BLO and 10 rows = 2″ square using a 4.5 mm hook.
Row 1: With Yarn A and a 4.5 mm hook, CH 10. SC in the 2nd CH from the hook and in each CH across. CH 1 and turn. [9 STS]
Row 2: SC in the first ST, SC BLO in each of the next 7 STS, and SC in the last ST. CH 1 and turn. [9 STS]
Rows 3–68: Repeat Row 2. Do not fasten off after the last row. [9 STS]
The brim, unstretched, should measure approximately 16″ long × 2¼” wide.
Join the Brim
- Bring the short ends together and align the first and last rows.
- Working through both layers, SL ST through the BLO of the first ST on the last row and the corresponding foundation CH on the opposite edge. Continue working a SL ST through the BLO of each ST and the corresponding foundation CH across.
- After joining, remove the hook from the working loop and turn the brim inside out so the seam is on the inside. This is now the right side of your work.
- Change to a 5 mm hook.
Step 2 — Crochet the Body
Rnd 1: With Yarn A and a 5 mm hook, CH 1. Work 1 SC in the end of each brim row (the visible holes). Join with a SL ST to the first SC. CH 1 with Yarn B. Drop Yarn A. [68 SC]
Rnd 2: With Yarn B, work (SC, DC) in the same ST. *Skip the next ST, (SC, DC) in the next ST; repeat from * around. Skip the last ST and join with a SL ST to the first SC. CH 1. [34 (SC, DC) groups]
Rnd 3: With Yarn B, work (SC, DC) in the same ST. *Skip the next ST, (SC, DC) in the next ST; repeat from * around. Skip the last ST and join with a SL ST to the first SC; change to Yarn C and CH 1. [34 (SC, DC) groups]
Rnds 4–5: With Yarn C, repeat Rnd 3. At the end of Rnd 5, change to Yarn B and CH 1.
Rnds 6–7: With Yarn B, repeat Rnd 3. At the end of Rnd 7, change to Yarn A and CH 1.
Rnds 8–9: With Yarn A, repeat Rnd 3. At the end of Rnd 9, change to Yarn B and CH 1.
Rnds 10–11: With Yarn B, repeat Rnd 3. At the end of Rnd 11, change to Yarn C and CH 1.
Rnds 12–13: With Yarn C, repeat Rnd 3. At the end of Rnd 13, change to Yarn B and CH 1.
Rnd 14: With Yarn B, repeat Rnd 3. Do not change yarn. CH 1 and continue with closing the hat. [34
Step 3 — Close the Hat
Keep your tension slightly tight during the decrease rounds.
Rnd 15: With Yarn B, *HDC in each of the next 5 STS, HDC2TOG over the next 2 STS; repeat from * around. Work HDC in any remaining STS. Join with a SL ST to the first HDC. CH 1. [59 STS]
Rnd 16: *HDC in each of the next 4 STS, HDC2TOG over the next 2 STS; repeat from * around. HDC in each remaining ST. Join with a SL ST to the first HDC. CH 1. [50 STS]
Rnd 17: *HDC in each of the next 3 STS, HDC2TOG over the next 2 STS; repeat from * around. HDC in each remaining ST. Join with a SL ST to the first HDC. CH 1. [40 STS]
Rnd 18: *HDC in each of the next 2 STS, HDC2TOG over the next 2 STS; repeat from * around. HDC in each remaining ST. Join with a SL ST to the first HDC. CH 1. [30 STS]
Rnd 19: HDC2TOG around. HDC in each remaining ST. Join with a SL ST to the first HDC. CH 1. [15 STS]
Rnd 20: SC2TOG around. SC in each remaining ST. Join with a SL ST to the first SC. [8 STS]
Fasten off, leaving a 6–8″ tail. Thread the tail through the remaining STS and pull tightly to close the opening. Secure the tail and weave in all remaining ends. Attach a pom-pom and tag, if desired.
I offer full support to help you with any questions or challenges you might have. Feel free to drop your comments in the section below or join our Facebook group, where I, along with my wonderful testers and community members, will be more than happy to assist you!

Categories:
All Patterns, Christmas, Crochet Wearables, Favorites, Free Patterns, Gift Ideas, Hats & Scarves,

