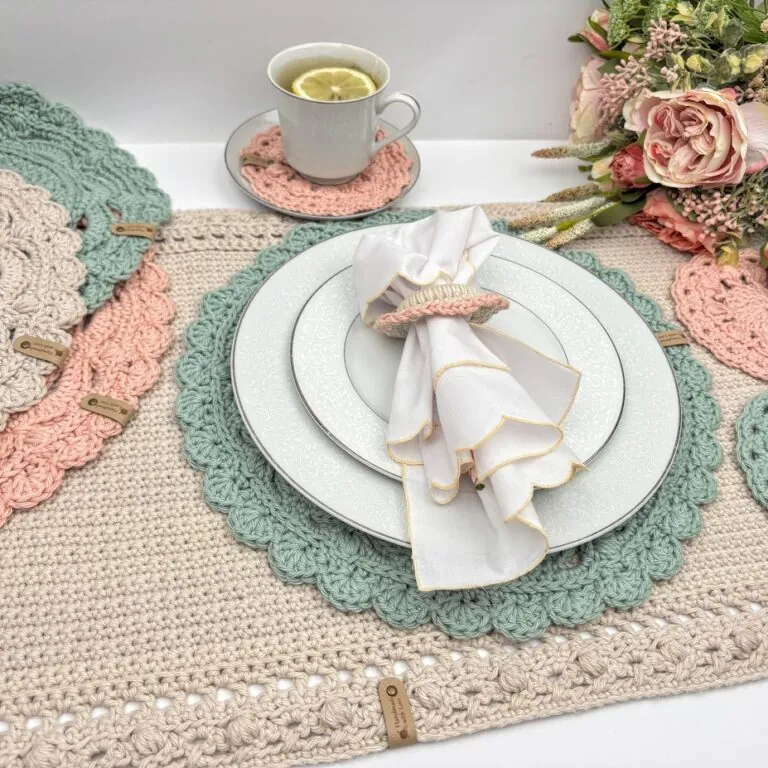
Meet the Madison Placemats! This free crochet placemat pattern makes a beautiful 13″ round doily-style placemat, plus a matching napkin holder built on a little wooden ring.
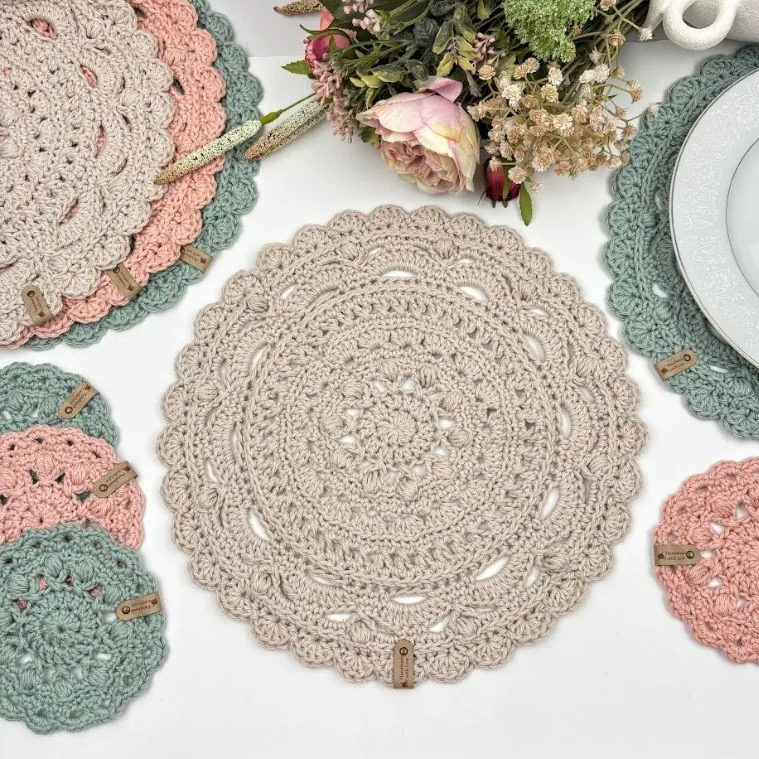
These are my favorite pieces in the Madison Table Set. The placemats are what started this whole project for me — I wanted to dress up my dining table with something handmade, something that felt like mine. So I made these pretty round crochet placemats in soft, washable cotton that handles warm dishes, finished with a scalloped edge that gives the table setting an elegant touch.
I had to add a matching napkin holder too — it’s a small thing, but it’s what makes the table look pulled together.
I used I Love This Cotton! for this set, though any soft worsted-weight cotton yarn will work beautifully. One skein makes one placemat plus two coasters, which I love.
The Madison Placemats are part of the Madison Table Set, so they coordinate with the Madison Coasters and table runner. Every pattern is free right here on the blog.
💡 Prefer an ad-free printable PDF? Or don’t want to wait for the next release? The complete Madison Table Set is available for purchase right now in my Etsy and Ravelry shops — all four patterns in one file, ready to print, so you can crochet the whole set at your own pace.
Madison Round Doily Placemats — Free Crochet Pattern Below
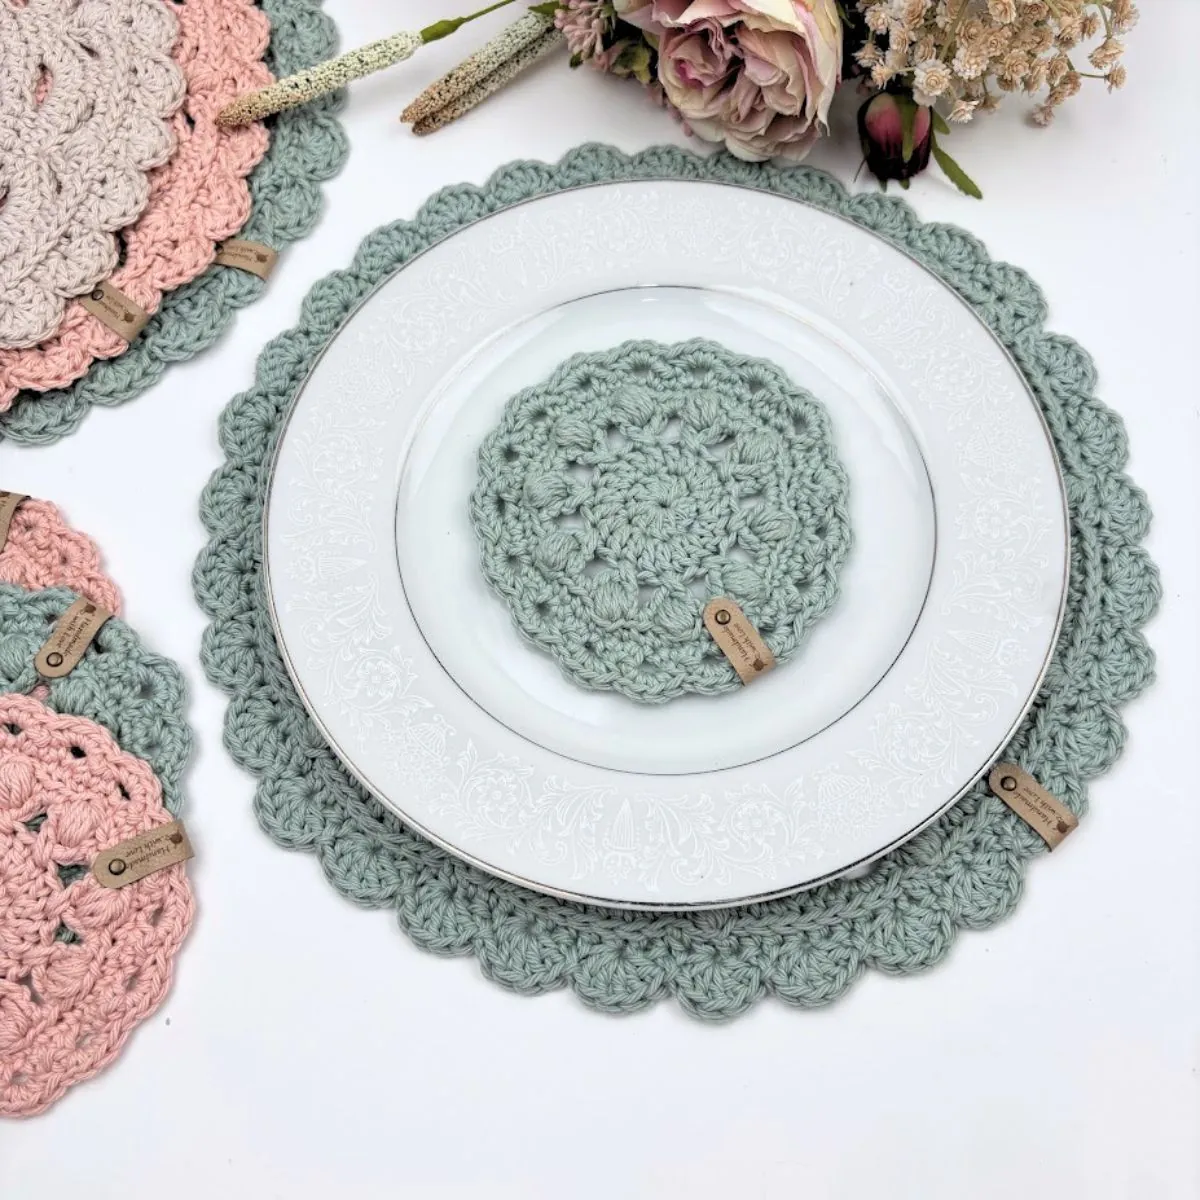
Recommended yarn: #4 Worsted-weight cotton yarn. I used: I Love This Cotton Yarn; colors shown: Warm Blush | Serene Spa | Parchment.
Yardage: 2.6 oz (134 yards) per placemat
Yarn substitution: Any soft #4 worsted-weight cotton will work. Paintbox Cotton Aran and Lion Brand Made With Love Cotton are good soft alternatives at a similar price point. Just avoid the classic dishcloth cottons like Sugar’n Cream or Handicrafter — they’re rough on your hands, and the stitches don’t pop the same way.
Finished size: 13” in diameter
Crochet hook: 5 mm hook.
Other materials
- Faux leather tags
- 2 in. wooden ring (for the napkin holder)
Gauge: Rounds 1–6 measure about 5″ in diameter using a 5 mm hook.
Abbreviations:
- CH: Chain
- ST: Stitch
- SLST: Slip stitch
- SC: Single crochet
- HDC: Half double crochet
- BLO: Back loop only
- FLO: Front loop only
- PF: Puff stitch
- SSC: Stacked single crochet
- SP: Space
- YO: Yarn over
- SK: Skip
- Rnd: Round
- Rep: Repeat
Pattern notes:
- Terminology: Written in US terms.
- Difficulty: Easy to intermediate.
- The numbers at the end of the rows are the stitch count for that row.
Special stitches:
- Puff stitch (PF): * YO, insert hook in indicated sp, pull up a loop,* rep *to* 3 more times in same sp. (9 loops on hook.) YO, pull through all loops, CH 1 to close the PF (CH1 doesn’t count as a ST)
- HDC in the 3rd Loop: Instead of inserting your hook under the top two loops of the ST, turn your work slightly toward you and insert your hook into the 3rd loop (the horizontal bar located behind the top “V” of the HDC). YO, pull up a loop, YO, and pull through all three loops on the hook as you normally would to complete the HDC. Watch here.
- Stacked single crochet (SSC): Work 1 SC in the 1st ST, then insert the hook into the left vertical bar of the SC just made, YO and pull up a loop, YO, and pull through both loops. Watch here.
- Cross Stitch: Sk the next ST or STS, then work 1 DC in the next ST. Working in front of the DC you just made, work 1 DC in the skipped stitch. The two stitches cross to form an “X.” Watch here.
Step 1 — Crochet the Placemat
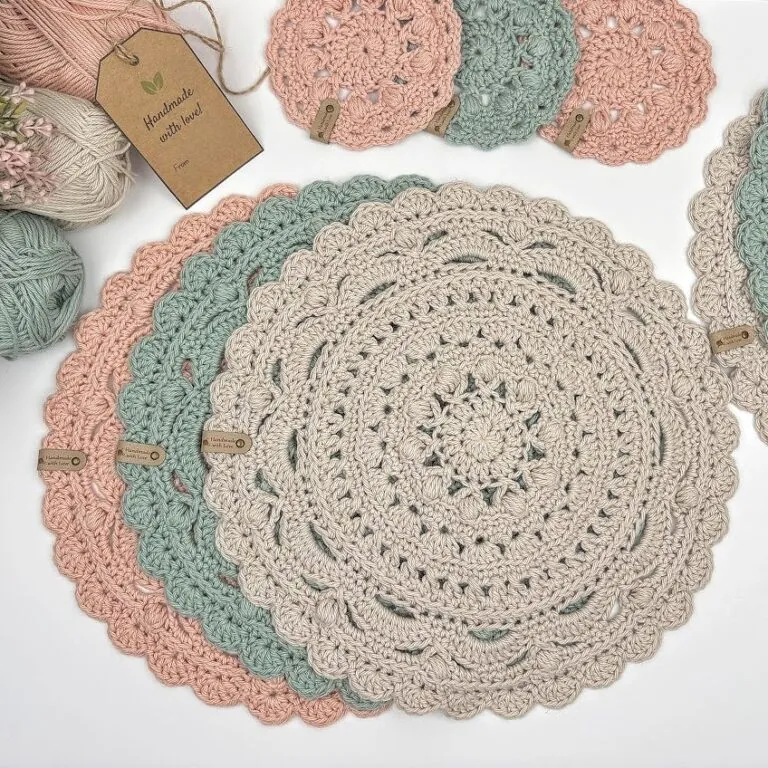
Rnd 1: With a 5 mm hook, make a magic circle, CH 2, 10 DC in the circle. Join with a SL ST to the first DC. CH 2. (10 ST) Pull the tail tightly to close the magic circle, then secure it with a knot.
Rnd 2: 2 DC in each ST around. Join with a SL ST to the first DC. CH 2. (20 ST)
Rnd 3: DC in the next ST, CH 2, DC in the ST holding the CH 2 to form a Cross ST, CH 2, *SK the next ST, DC in the next ST, CH 2, DC in the skipped ST to form a Cross ST, CH 2; rep from * around, ending with CH 2. Join with a SL ST to the first DC. CH 1. (10 Cross ST)
Rnd 4: *(SC, PF, SC) in the next CH-2 sp, 2 SC in the next CH-2 sp; rep from * around. Join with a SL ST to the first SC. CH 1. (10 PF)
Note: Your work may look a little curly at this point, but that’s completely normal. It will straighten out as you continue working.
Rnd 5: SC BLO in each ST around, 2 SC BLO in the last ST. Join with a SL ST to the first SC. CH 1. (51 ST)
Note: Remember that the CH used to close the Puff Stitch does not count as a stitch, so simply skip it when working the SC BLO.
Rnd 6: SC in the join and in each of the next 2 ST, *CH 3, SC in each of the next 3 ST; rep from * around until 3 ST remain, SC in the last 3 ST, CH 3. Join with a SL ST to the first SC. CH 1. (17 CH-3 sp)
Rnd 7: SK the first 2 ST, *5 DC in the next CH-3 sp, SK the next 3 ST; rep from * around. Join with a SL ST to the first DC. CH 1. (17 5-DC groups)
Rnd 8: SC BLO in each ST around. Join with a SL ST to the first SC. CH 3. (85 ST)
Rnd 9: *SK the next ST, DC in the next ST, CH 1, DC in the skipped ST to form a Cross ST; rep from * around. Join with a SL ST to the first DC. CH 1. (42 Cross ST)
Rnd 10: HDC in the same ST as the join, *HDC in the next CH-1 sp, HDC in the next SP between Cross ST groups; rep from * around. Join with a SL ST to the first HDC, CH 1 (84 ST)
Rnd 11: HDC in the 3rd loop of each ST around; join with a SL ST to the first HDC, CH 1. (84 ST)
Rnd 12: SC in the join and in each of the next 2 ST, *CH 6, SK the next 3 ST, SC in each of the next 4 ST; rep from * around until 4 ST remain, CH 6, SK the next 3 ST, SC in the last ST. Join with a SL ST to the first SC. CH 1. (12 CH-6 sp)
Rnd 13: SC in the join and in each of the next 2 ST, *9 DC in the next CH-6 sp, SK the next ST, SC in each of the next 3 ST; rep from * around, ending with 9 DC in the last CH-6 sp. Join with a SL ST to the first SC, CH 2. (12 9 -DC groups)
Rnd 14: SK the next ST, DC in the next ST, CH 2, DC in the join, *CH 3, SK the next 3 ST, SC in each of the next 3 ST, CH 3, SK the next 5 ST, DC in the next ST, CH 2, DC in the fourth skipped ST; rep from * around, ending with SC in each of the next 3 ST, CH 3. Join with a SL ST to the first DC. (12 Cross ST)
Rnd 15: *(SC, PF, SC) in the next CH-2 sp, 3 HDC in the next CH-3 sp, SK the next SC, HDC in each of the next 2 ST, 3 HDC in the next CH-3 sp; rep from * around. Join with a SL ST to the first SC. CH 1. (12 PF)
Rnd 16: HDC in the join, HDC BLO in the next 2 ST, *HDC in the 3rd loop of the next 8 ST, HDC BLO in each of the next 3 ST; rep from * around. Join with a SL ST to the first HDC. CH 1. (132 ST)
Rnd 17: *SK the next ST, 5 DC in the next ST, SK the next ST, SL ST in the next ST; repeat from * around. Join with a SL ST to the first SL ST. Fasten off. Weave in all ends, and you are all done!
Step 2 — Crochet the Napkin Holder
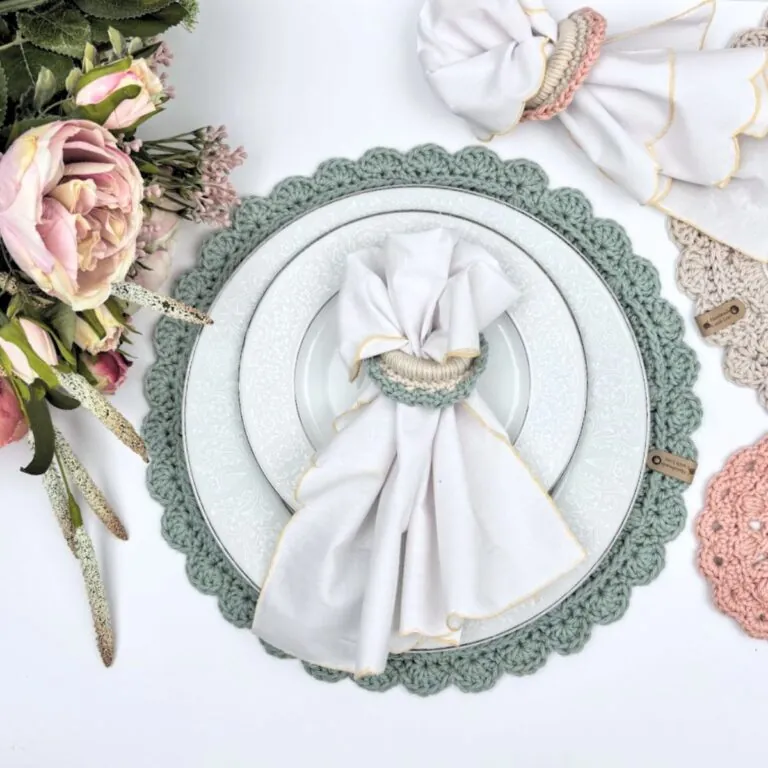
Make a slip knot with working yarn. *Insert your hook through the center of the wooden ring and pull up a loop. YO and pull through both loops on your hook. Repeat from * around the ring, wrapping the yarn around the wooden ring as you crochet until it is completely covered; join with a SL ST to the first ST,
Rnd 1: SC in each ST around, join with an SL ST into the 1st ST, CH1 with the contrast yarn, cut working yarn.
Rnd 2: *Sk the next ST. In the next st, work (SC, CH1, SC). Repeat from* around. Join with a SL ST to the first ST.
Fasten off and you are all done!
I offer full support to help you with any questions or challenges you might have. Feel free to drop your comments in the section below or join our Facebook group, where I, along with my wonderful testers and community members, will be more than happy to assist you!